Drawing inspiration from mid-century modern design and Scandinavian hygge, this suspended paper mobile features balanced geometric shapes—such as brass hoops, delicate diamonds, and folded polyhedra—that rotate gently with the subtle currents of air in a room.
- Materials & Tools Needed: Heavy metallic cardstock (gold, copper, and marble patterns), fishing line or metallic thread, brass geometric hoops, a sewing machine or strong craft glue, and a wooden dowel or branch for the hanger.
- Step-by-Step Construction:
- Cut multiple identical geometric shapes (such as equilateral triangles, diamonds, or hexagons) out of your metallic cardstock.
- Fold each shape down its central axis. Score cleanly with a bone folder.
- Sew down the center crease of folded shapes using a sewing machine to string them together in vertical garlands, or glue matching halves back-to-back around a central hanging thread to create 3D multi-faceted polyhedra stars.
- Tie your finished paper strands at varying heights onto a suspended natural branch or brass hoop, ensuring the mobile is balanced and weight is distributed evenly.
- Pro Tips for an Aesthetic Finish: Less is more. Sticking to three metallic tones (like brushed gold, matte white, and warm copper) keeps the mobile looking chic rather than cluttered.
- Creative Variations: Incorporate dried eucalyptus leaves or small glass crystal beads interspersed between the paper geometric shapes to catch sparkling shafts of sunlight.
8. Folded Book Art Sculpture
Transform a discarded, thrifted hardcover book into a stunning sculptural monument of love or identity. By precisely measuring, marking, and folding the individual pages according to a calculated pattern, the side-profile of the book spells out a word like “LOVE,” “HOME,” or a couple’s initials.
- Materials & Tools Needed: A thick hardcover book (at least 350-400 pages with clean, white pages), a metal ruler, a sharp pencil, a bone folder, and a printed folding pattern template.
- Step-by-Step Construction:
- Select a book with a page count that matches your pattern requirement.
- Following your specific pattern template, use a ruler and pencil to mark the exact top and bottom page measurements for every single page.
- For each page, fold the top corner down to your upper pencil mark, and fold the bottom edge up to your lower pencil mark, creasing sharply with your bone folder.
- Continue folding page by page. As you progress, the folded edges will collectively form the pixelated, sculptural silhouette of your chosen letter or shape along the outer fore-edge of the book.
- Stand the book open at roughly 180 degrees to display your finished art piece.
- Pro Tips for an Aesthetic Finish: Choose a book with a beautiful cloth-bound spine so that the book looks gorgeous from every angle when displayed on a bookshelf or coffee table.
- Creative Variations: Fold a heart shape instead of a word, or add a ribbon bookmark featuring a sweet handwritten quote hanging from the center.
9. Botanical Pressed Flower Bookmark Set
For the voracious reader, a mass-produced paper bookmark feels utilitarian. A transparent, laminated bookmark featuring real pressed wildflowers encased between sheets of handmade rag paper and archival laminate is a daily luxury that makes reading feel like an aesthetic ritual.
- Materials & Tools Needed: Heavy watercolor paper, assorted pressed wildflowers and delicate leaves, archival spray adhesive, clear self-adhesive laminating sheets or a thermal laminator, a hole punch, and silk or velvet ribbon.
- Step-by-Step Construction:
- Cut your watercolor paper into elegant, slim bookmark rectangles (approx. 2×7 inches).
- Arrange an artful composition of pressed flowers and leaves on the front face of each paper rectangle, securing them lightly with tiny dots of spray adhesive so they don’t shift.
- Carefully sandwich the decorated paper rectangle inside a clear self-adhesive laminating pouch or run it through a thermal laminator.
- Trim around the edges with a precision paper trimmer, leaving a clean 2mm clear border of laminate to seal the paper completely against moisture and wear.
- Punch a hole at the top center of each bookmark and thread a luxurious silk or velvet ribbon through the loop.
- Pro Tips for an Aesthetic Finish: Add a handwritten quote from the recipient’s favorite author using fine calligraphy ink on the paper before sealing it inside the laminate.
- Creative Variations: Create seasonal sets of four (Spring blossoms, Summer ferns, Autumn leaves, Winter pine needles) packaged together in a hand-stamped linen pouch.
10. Cascading Origami Crane Wishing Jar
The legendary Japanese tradition holds that folding one thousand origami cranes grants a wish. While a thousand might be ambitious for a single gift, a stunning glass apothecary jar filled with a gorgeous cascading constellation of miniature origami cranes makes an unforgettable talisman of healing, peace, and good fortune.
- Materials & Tools Needed: Small square paper sheets (ranging from 2×2 inches down to 1×1 inch) in a coordinated color gradient, a tall glass apothecary jar with a cork lid, fine gold metallic thread, and a sewing needle.
- Step-by-Step Construction:
- Fold your mini paper squares into classic traditional origami cranes (valley folds, mountain folds, petal folds for wings and head).
- Thread your needle with fine gold metallic thread and gently pierce the center back of each finished crane, knotting the thread underneath so the cranes appear to float vertically along the string.
- Create multiple vertical strings of varying lengths, populated with cascading colored cranes.
- Suspend the top ends of the threads from the underside of the cork jar lid, or arrange them to cascade naturally as you lower them into the glass apothecary jar.
- Seal the jar with its cork lid and tie a velvet bow around the neck.
- Pro Tips for an Aesthetic Finish: Use gradient paper (e.g., transitioning from deep navy blue to soft sky blue and crisp white) to create an ombre effect inside the glass vessel.
- Creative Variations: Write tiny secret wishes or blessings on the inside of the square paper before folding each crane so the recipient can discover hidden messages.
11. Textured Paper-Mache Catchall Trinket Dish
Paper mache is often relegated to elementary school science fair projects, but with refined technique, minimalist palettes, and modern matte sealing, it transforms into high-end ceramic-look decor. This organic, undulating trinket dish is perfect for holding rings, keys, or crystals on a bedside table.
- Materials & Tools Needed: Torn strips of newspaper or recycled tissue paper, papier-mache paste (equal parts flour and water with a dash of salt), a glass bowl to use as a mold, plastic wrap, fine-grit sandpaper, acrylic gesso, and matte acrylic paint in earthy tones (terracotta, sage, sand).
- Step-by-Step Construction:
- Cover the outside of your glass mold bowl tightly with plastic wrap so the paper-mache won’t stick.
- Dip torn strips of paper into your papier-mache paste, wiping off excess, and lay them smoothly across the inverted mold bowl, overlapping in crisscross patterns.
- Build up 4 to 6 layers of paper thickness, ensuring the edges are neat and slightly irregular for an organic artisan aesthetic.
- Let the dish dry completely in a warm, sunny spot for 48 hours. Once bone dry, carefully pop the paper-mache bowl off the mold and peel away the plastic wrap.
- Trim any ragged edges with scissors, sand the surface smooth with fine-grit sandpaper, prime with white gesso, and paint in your chosen matte earth tone. Seal with a clear matte varnish.
- Pro Tips for an Aesthetic Finish: Apply a final subtle brush of metallic gold leaf along the rippled organic rim of the dish for a luxurious modern touch.
- Creative Variations: Embed dried lavender buds into the final outer layer of paper mache so the dish imparts a gentle, calming scent to any jewelry stored inside.
12. Hand-Bound Leather and Paper Sketchbook
For artists, writers, and dreamers, a custom hand-bound sketchbook is the ultimate luxury. Combining supple leather or thick cardstock covers with exposed Coptic stitch binding using waxed linen thread, this gift is a masterclass in traditional bookbinding arts.
- Materials & Tools Needed: Heavy drawing paper signatures (folded pages), a piece of soft full-grain leather or heavy cardstock for the cover, waxed linen bookbinding thread, a bookbinding needle, an awl, and a cork-backed metal ruler.
- Step-by-Step Construction:
- Fold multiple sheets of drawing paper in half to create several multi-page packets called signatures.
- Use an awl to punch uniform alignment holes along the folded spine fold of each signature.
- Cut your leather cover to size, marking matching puncture holes that align with your signatures.
- Using your bookbinding needle and waxed linen thread, execute a Coptic stitch binding pattern, looping the thread through the cover and around the chain stitches linking each successive signature together along the exposed spine.
- Pull all stitches taut and tie secure knots at the ends, leaving the decorative chain-stitch spine proudly visible and structurally sound.
- Pro Tips for an Aesthetic Finish: Wax your linen thread thoroughly with beeswax before sewing to prevent tangling and ensure the binding lasts a lifetime.
- Creative Variations: Personalize the leather cover by blind-embossing the recipient’s initials using heated metal stamping type.
13. Minimalist Layered Paper Architecture Relief
Taking inspiration from topographical maps and architectural contour models, this piece builds a stunning 3D mountain landscape or urban skyline by layering dozens of laser-cut or hand-cut cardstock sheets within a deep frame, creating incredible depth through shadows.
- Materials & Tools Needed: Heavy white cardstock sheets (250gsm+), a precision craft knife or digital cutting machine, foam mounting dots (varying thicknesses), a shadow box frame, and a pencil.
- Step-by-Step Construction:
- Sketch or map out a multi-layered landscape (such as rolling hills, mountain ranges, or coastal cliffs) across 6 to 10 sequential layers, where each layer represents a further distance in the background.
- Cut out each individual layer from your white cardstock, modifying the negative space and horizon lines so each sheet reveals a different depth of the scene.
- Stack the layers sequentially from back to front, placing small foam mounting dots between each sheet to create physical air gaps (depth) between the layers.
- Mount the entire multi-tiered assembly inside your shadow box frame. When light hits the top, each paper tier casts a delicate shadow onto the layer beneath it.
- Pro Tips for an Aesthetic Finish: Keep the entire composition monochromatic (pure matte white) so the focus remains entirely on the stunning interplay of light, shadow, and architectural form.
- Creative Variations: Illuminate the layers from behind using an ultra-thin LED strip hidden inside the frame to turn the relief art into an ambient nightlight.
14. Exquisite Origami Gift Box with Floral Lid
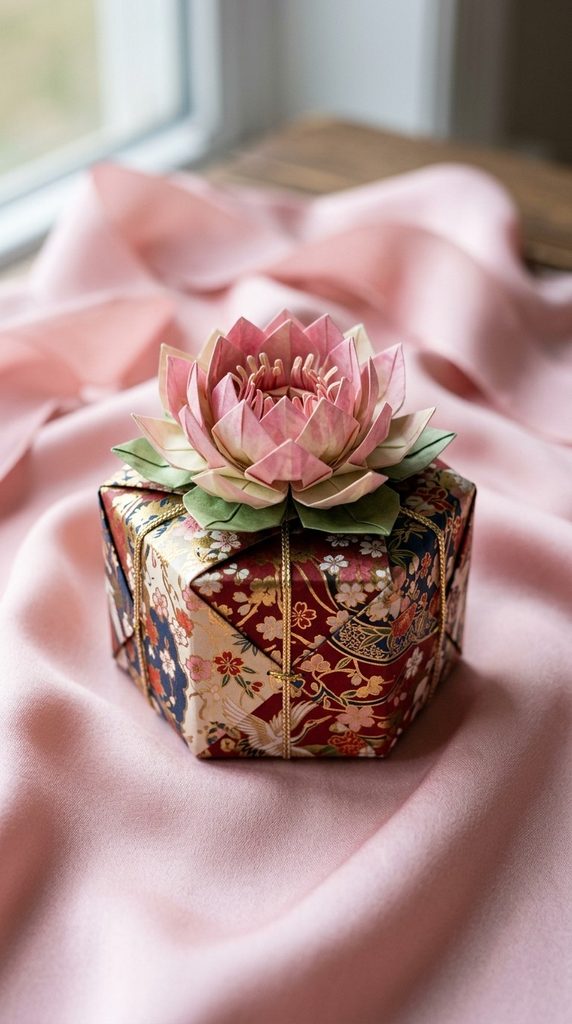
The unboxing experience is half the joy of receiving a gift. This intricate origami box features a lid adorned with a blooming modular paper lotus flower or cherry blossom cluster, making the packaging itself an unforgettable keepsake.
- Materials & Tools Needed: Two square sheets of heavy metallic or patterned origami paper (one slightly smaller than the other to form the base and lid), bone folder, and double-sided craft tape.
- Step-by-Step Construction:
- Take the larger square paper and fold it into the classic traditional square origami box base (blintz fold, valley folds to center, locking the sides up).
- Take the slightly smaller square paper and repeat the exact folding process to create the matching telescoping lid.
- Fold separate miniature origami flower petals out of contrasting pastel paper and assemble them into a blooming rosette.
- Secure the paper floral rosette to the center top of the box lid using double-sided craft tape or a drop of hot glue.
- Pro Tips for an Aesthetic Finish: Use heavy 120gsm patterned Japanese Chiyogami paper featuring metallic gold ink accents for an authentic, luxurious look.
- Creative Variations: Tuck a tiny handwritten note inside the petals of the lid flower so the recipient discovers a secret message before even opening the main box.
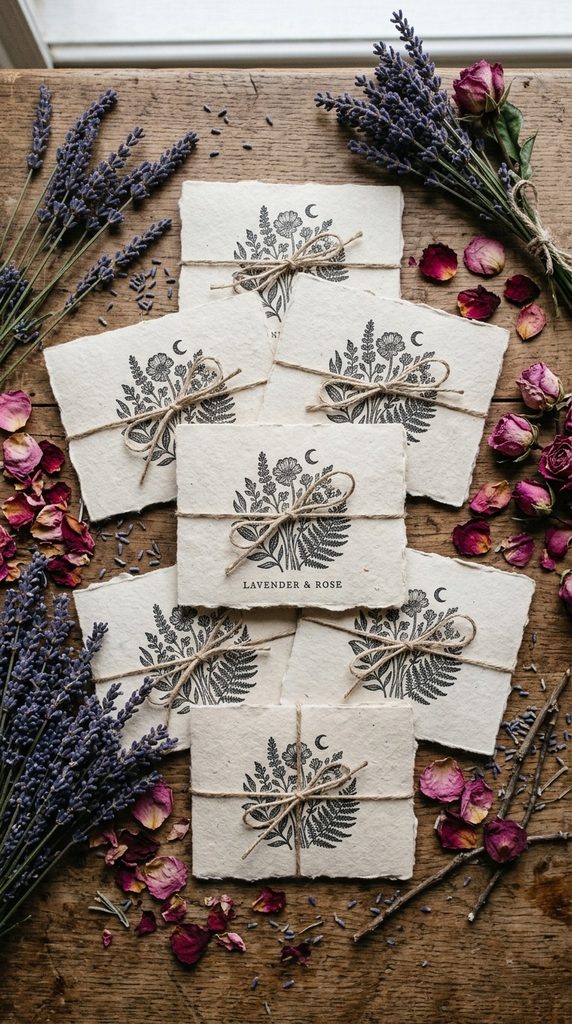
15. Fragrant Botanical Scented Paper Sachet Envelopes