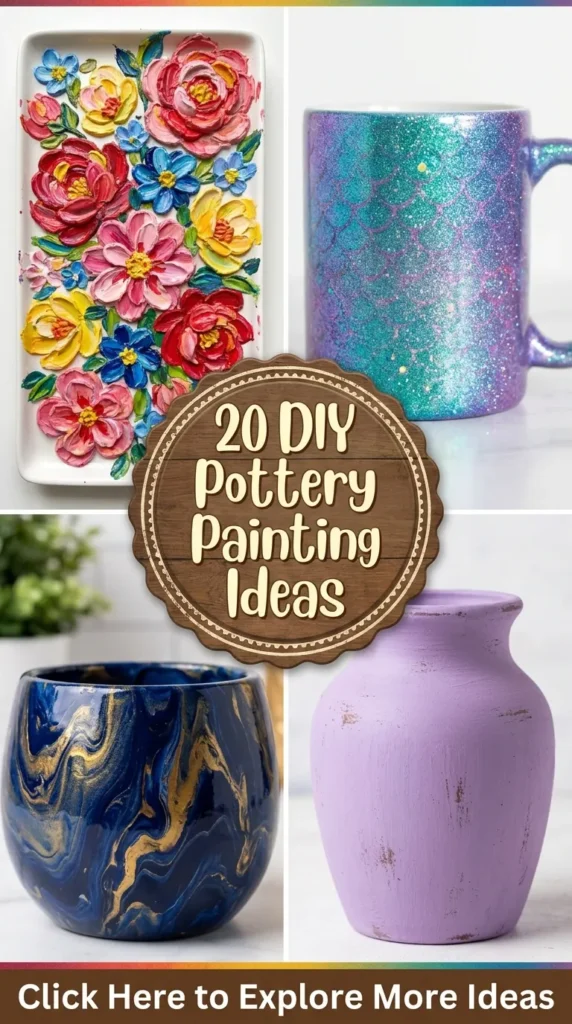
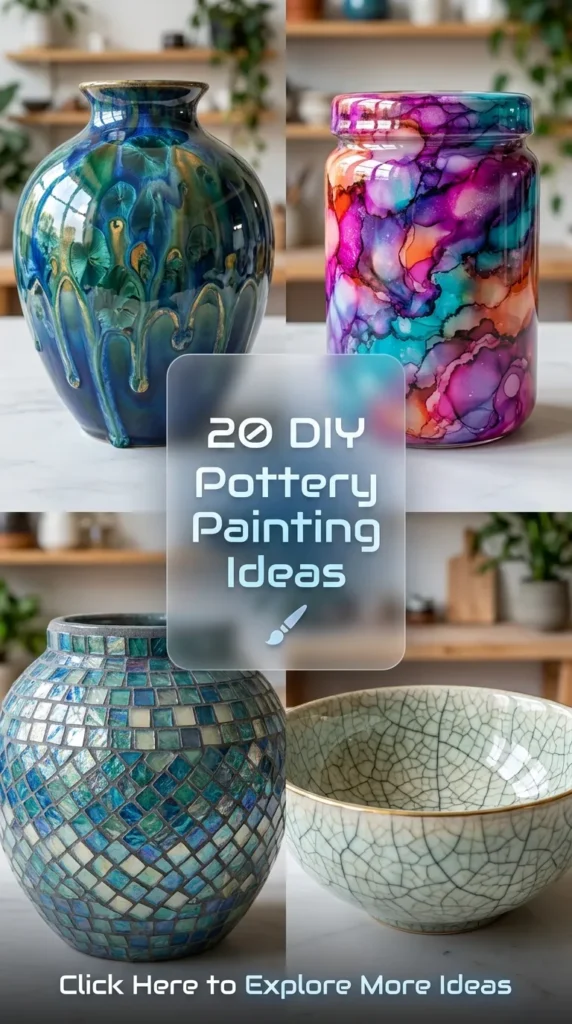
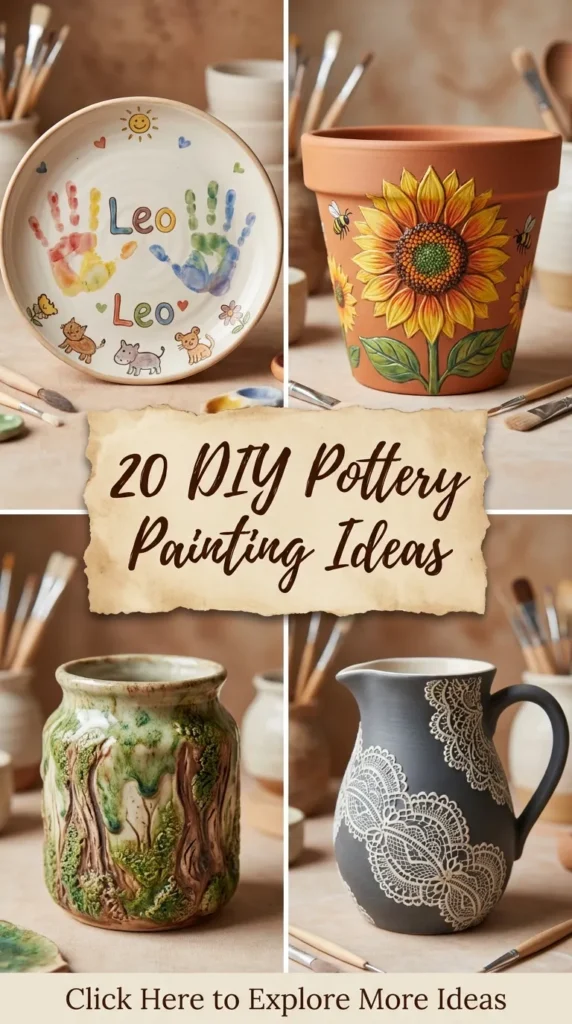
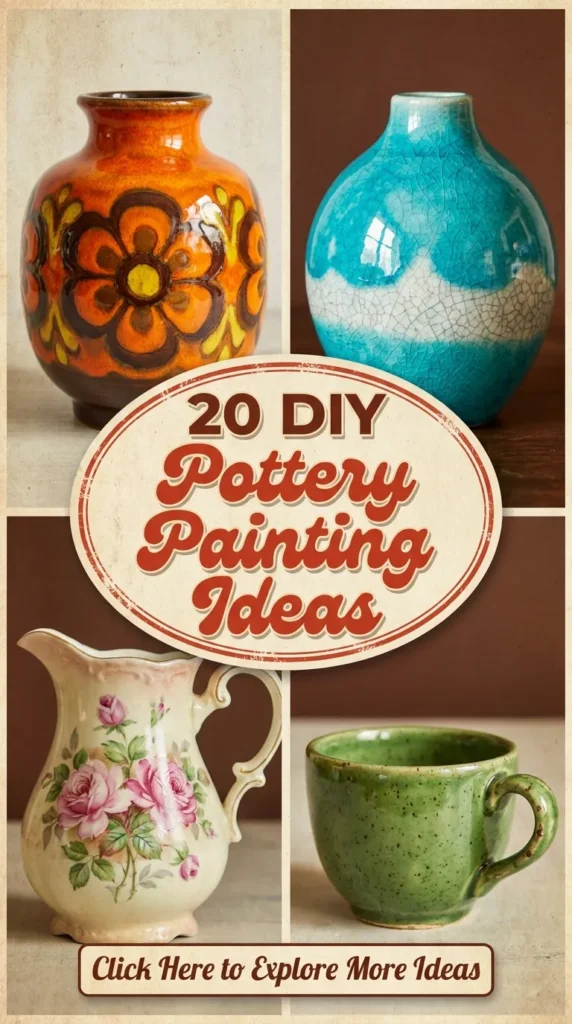
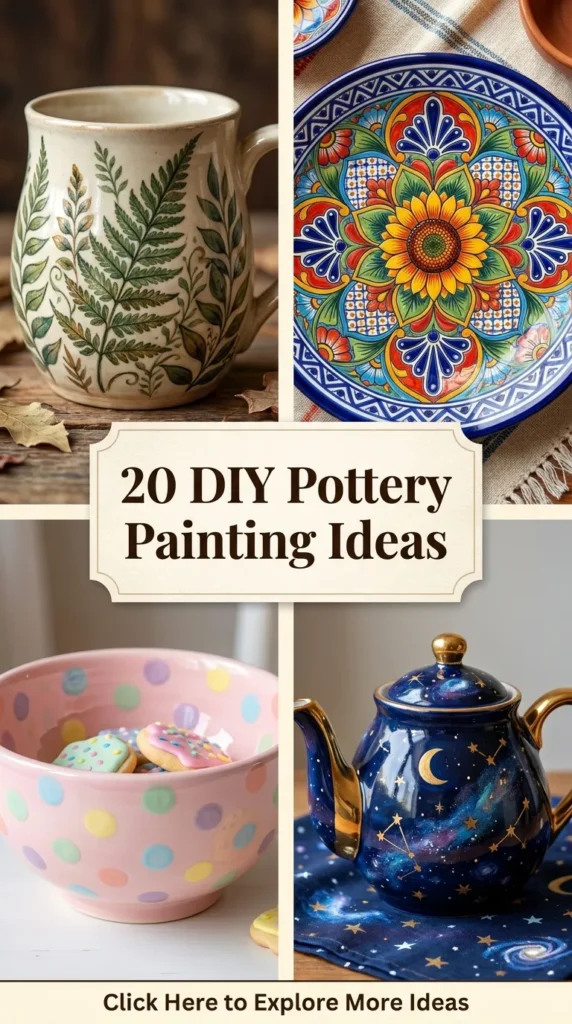
Pottery painting has evolved into one of the most therapeutic, creative, and aesthetically satisfying DIY crafts. Whether you are transforming a plain ceramic mug, updating an unglazed terracotta planter, or creating custom dinnerware for your home, hand-painted pottery adds personal charm and tactile elegance to any living space.
If you are looking for fresh, Pinterest-worthy inspiration, this ultimate guide breaks down 20 painting ideas. Each idea includes what makes the design special, a step-by-step guide to executing it, key tips and variations, and a list of materials needed to bring your vision to life.
1. Soft Botanical Leaf Prints
What This Idea Means
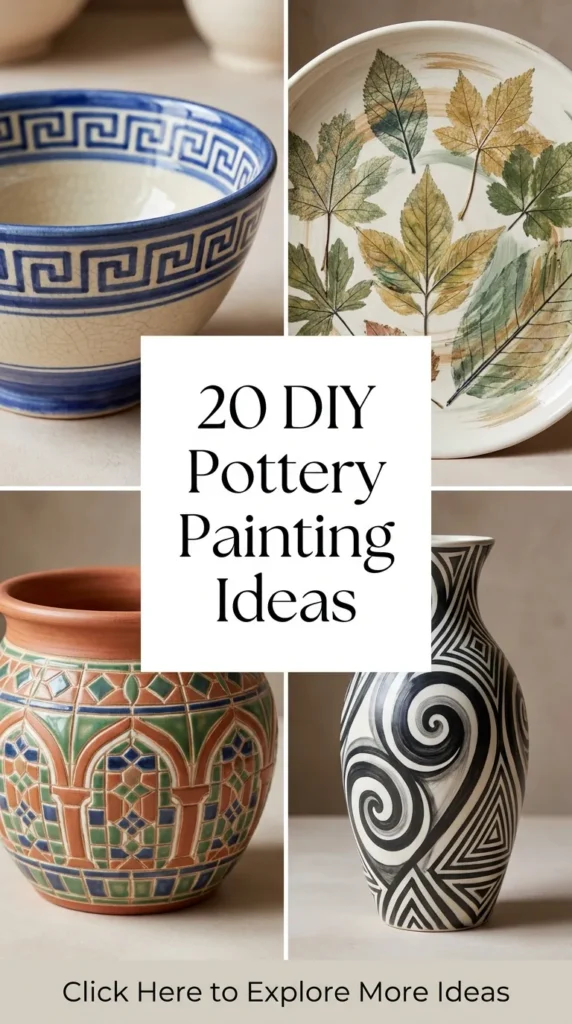
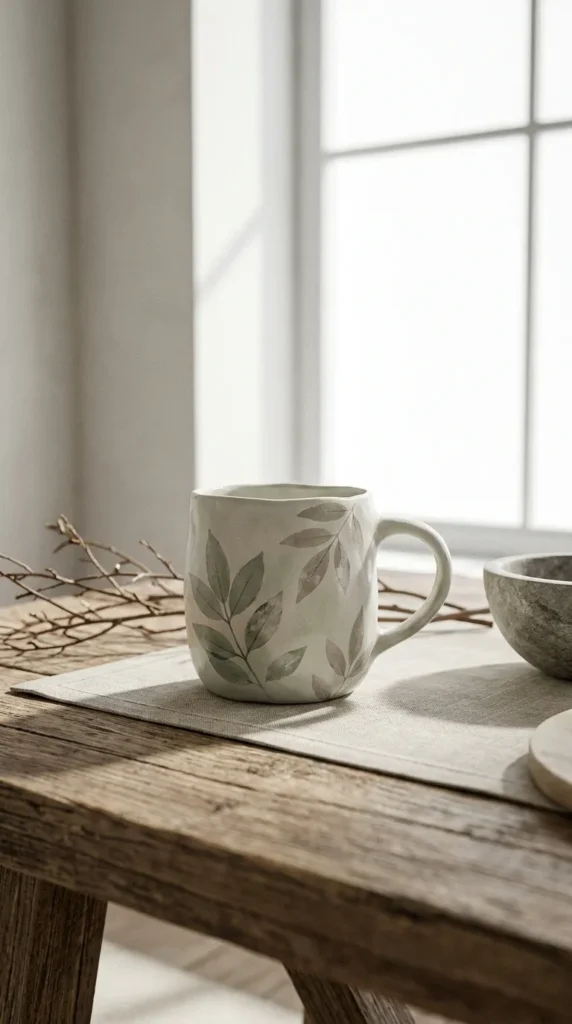
Soft Botanical Leaf Prints capture the peaceful, organic vibe of Scandinavian and Japandi interior design. Instead of bold, artificial tropical leaves, this style focuses on delicate, airy foliage such as eucalyptus stems, monstera silhouettes, fern leaves, or olive sprigs painted in muted sage green, muted olive, or warm taupe.
How to Make It
- Prepare the Surface: Wipe down your ceramic piece with a damp cloth to remove residual dust. Apply a matte beige or off-white base coat and let it dry completely.
- Sketch Lightly: Using a graphite soft-lead pencil, sketch delicate stem lines sweeping gently around the curve of your vessel.
- Paint the Stems: Use a fine liner brush (#0 or #1) with desaturated green acrylic or ceramic paint to trace the main stem lines.
- Add the Leaves: Switch to a round brush (#3). Load paint onto the tip, press down firmly on the ceramic surface to form the leaf body, and pull away gently to create a natural, tapered tip.
- Add Highlights: Mix a touch of creamy white into your green shade and add subtle highlight strokes down one side of each leaf.
- Seal: Once dry, apply a satin or glaze varnish.
Tips & Variations
- Monochrome Wash: Try painting the botanical elements entirely in warm white over a dark charcoal ceramic background for a striking moody contrast.
- Real Leaf Stamping: Press a tiny real leaf onto a damp sponge dipped in paint, then gently press the leaf onto the ceramic surface for authentic organic texture.
Needs & Materials
- Plain ceramic mug, bowl, or planter
- Ceramic or acrylic paint (Sage Green, Taupe, Warm White)
- Fine liner brush (#0) and round brush (#3)
- Soft-lead pencil and eraser
- Clear ceramic glaze or sealant
2. Minimalist Terrazzo Speckles
What This Idea Means
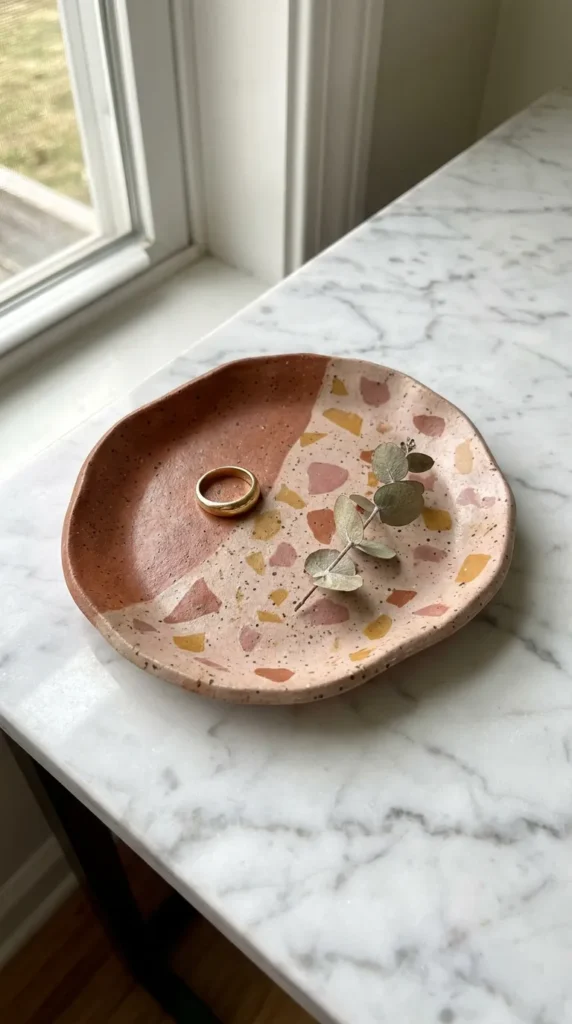
Terrazzo originates from Italian architecture, but its modern pastel variation has taken Pinterest by storm. This look features irregular, flat geometric shapes scattered randomly across a neutral background, mimicking composite marble and granite chips with an artistic, playful edge.
How to Make It
- Base Coat: Apply two coats of crisp white, soft ivory, or light blush glaze/paint over the entire ceramic piece. Allow to dry completely.
- Mix Palette: Prepare 3–4 complementary paint colors (e.g., rust orange, sage, dusty pink, and warm ochre).
- Paint Shapes: Using a small flat square brush, randomly paint small, irregular polygon shapes across the surface. Ensure the shapes vary in size—some tiny flecks, some medium blobs.
- Maintain Balance: Keep spatial distribution balanced; avoid placing identical colors or shape sizes directly next to one another.
- Finish: Seal with a glossy finish coat to emulate polished terrazzo stone.
Tips & Variations
- Speckled Overlay: After painting your terrazzo flecks, flick a toothbrush dipped in diluted dark grey paint over the surface to give it a stone-grained texture.
- Metallic Accent: Swap one of your colors for liquid gold leaf to give your terrazzo a glamorous sheen.
Needs & Materials
- Ceramic tray, coaster, or vase
- Acrylic or ceramic paint in pastel and earth tones
- Small flat synthetic brush
- Toothbrush (optional for flicking)
- High-gloss clear topcoat
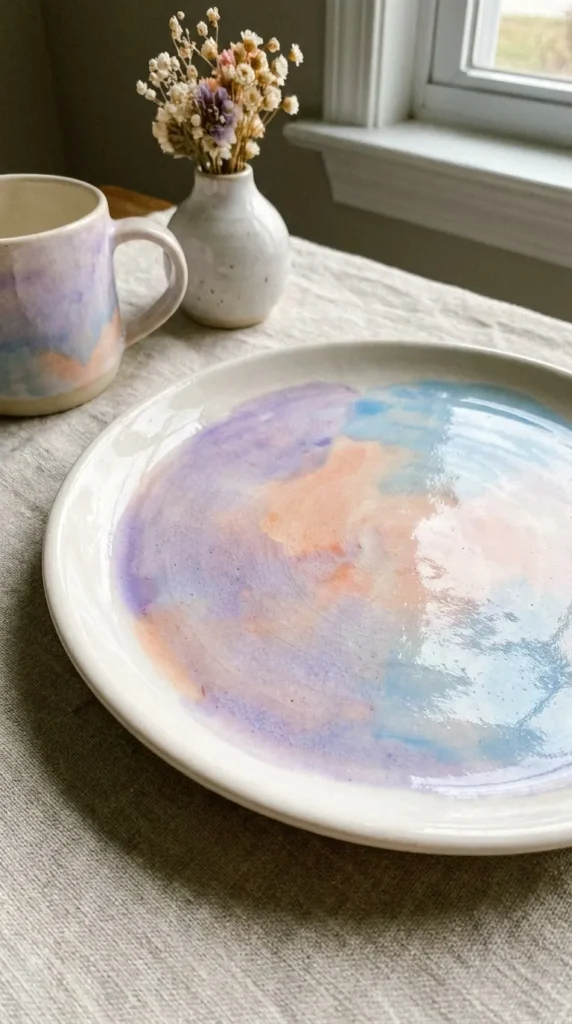
3. Pastel Watercolor Wash
What This Idea Means
The Pastel Watercolor Wash brings fluid movement, softness, and dreamy hues to your ceramic pieces. By diluting ceramic glazes or specialty paints, colors bleed together seamlessly, creating a cloudy, ethereal atmosphere reminiscent of morning light or watercolor paintings.
How to Make It
- Dampen Surface: Clean your white ceramic piece. Slightly moisten the surface with a clean wet sponge.
- Dilute Paints: Mix your chosen pastel colors (e.g., lavender, sky blue, soft peach) with water or glaze medium to achieve a translucent consistency.
- Apply Color Droplets: Load a large mop brush with paint and douse areas of the ceramic. Let the wet paint pool, drip, and run naturally.
- Blend Edges: Use a wet, clean sponge or fluffy brush to softly blend overlapping borders where colors meet.
- Dab Excess: Gently dab away drips with a paper towel if they accumulate too heavily at the base.
- Bake or Seal: Allow complete drying before firing or applying a clear coat.
Tips & Variations
- Gold Veins: Once the watercolor wash is dry, paint fine, jagged lines of gold luster along the borders where two colors bleed together.
- Salt Effect: While the paint is still wet, sprinkle coarse sea salt over the ceramic to pull pigment and create starburst spots.
Needs & Materials
- Smooth white ceramic plate or mug
- Dilutable ceramic paints or Underglazes (Lavender, Sky Blue, Peach)
- Large mop brush and sea sponge
- Water bowl and paper towels
- Gloss glaze coat
4. Checkerboard Grid Aesthetic
What This Idea Means
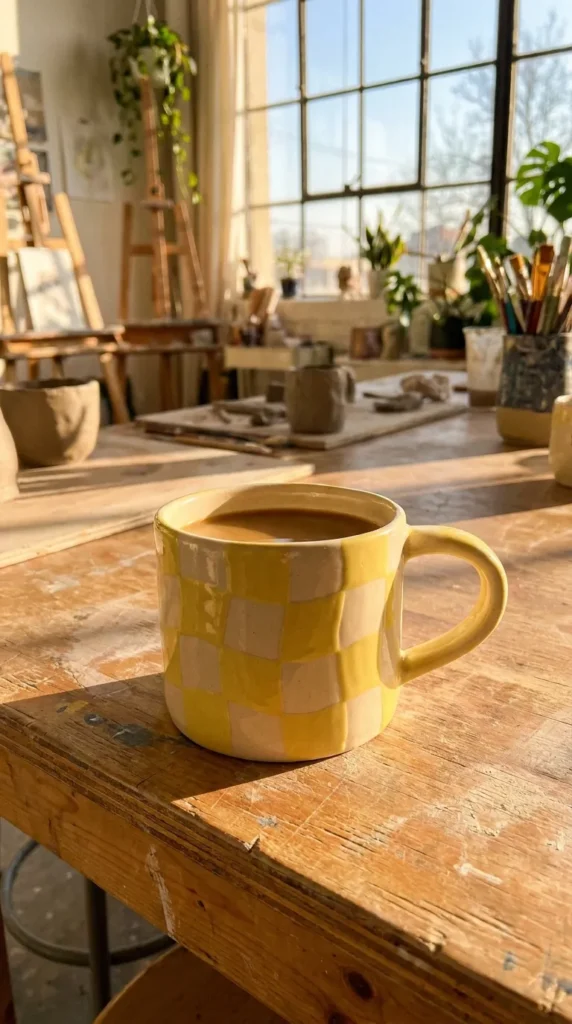
The classic check pattern has seen a major modern revival. Clean lines combined with a slight hand-painted imperfection make the checkered aesthetic feel whimsical, retro, and effortlessly stylish on home goods.
How to Make It
- Mark the Grid: Use a flexible ruler and soft pencil to lightly draw intersecting horizontal and vertical lines around your ceramic piece.
- Identify Squares: Lightly mark alternating squares with an “X” so you do not lose track of the pattern as you paint.
- Paint Alternating Squares: Using a medium flat brush, carefully fill in every other square with your primary color (e.g., butter yellow, forest green, or cobalt blue).
- Refine Edge Lines: Clean up messy edges with a fine detail brush dipped in your background base color.
- Seal: Let dry fully and coat with a high-shine clear glaze.
Tips & Variations
- Wavy Grid: Instead of ruler-straight lines, paint freehand squiggly lines to create a fluid, playful checkerboard pattern.
- Tone-on-Tone: Use two shades of the same color (e.g., cream and nude) for a subtle, high-end look.
Needs & Materials
- Flat ceramic tray, mug, or trinket dish
- Acrylic paint or ceramic paint
- Medium flat brush and fine detail brush
- Flexible ruler and soft graphite pencil
- Glossy topcoat
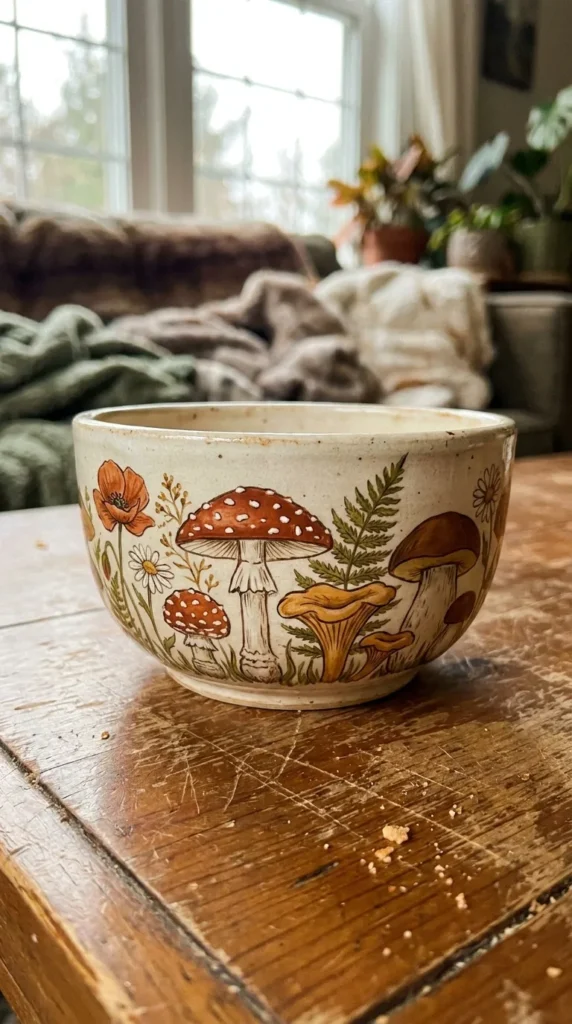
5. Cottagecore Mushroom & Wildflower Motif
What This Idea Means
Cottagecore aesthetics celebrate simple countryside living, folklore, and nature. Painting tiny Amanita mushrooms, wild daisies, clover, and moss onto ceramic mugs or bowls creates an inviting, fairytale charm ideal for cozy mornings.
How to Make It
- Base Layer: Paint your ceramic piece a warm cream, light stone, or biscuit color.
- Paint Mushroom Caps: Draw small semi-circles and dome shapes in rich terracotta red or earthy brown along the bottom third of your ceramic piece.
- Add Stems & Details: Use warm off-white paint to fill in the stems under the caps. Add small white dots across the red caps using the back end of a paintbrush handle.
- Add Wildflowers: Paint small green grass blades, tiny daisy petals, and delicate vines surrounding the mushrooms to fill negative space organically.
- Cure & Seal: Bake or apply clear glaze according to paint instructions.
Tips & Variations
- Vintage Sepia Tone: Paint the entire design using only shades of dark brown and beige on raw terracotta to mimic vintage encyclopedia illustrations.
- Gilded Accents: Highlight mushroom stems with metallic bronze paint for subtle shine.
Needs & Materials
- Ceramic mug or bowl
- Acrylic or underglaze paint (Cream, Terracotta Red, Brown, Forest Green, White)
- Fine detail liner brush and dotting tool (or paintbrush end)
- Matte or satin clear sealant
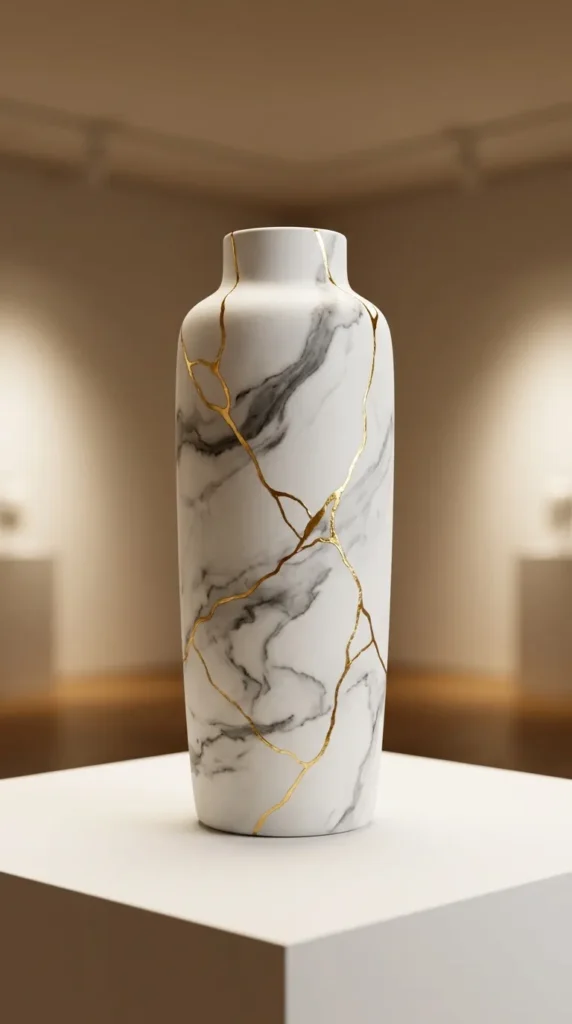
6. Golden Gilded Marble Strokes
What This Idea Means
Inspired by Kintsugi (the Japanese art of repairing broken pottery with gold), this design uses fluid, marble-like black and grey swirls accented with rich, metallic gold veins to create a luxurious, dramatic aesthetic.
How to Make It
- Base Coat: Start with a clean white or black glossy ceramic surface.
- Create Marble Swirls: Dip a damp feather or thin liner brush in charcoal grey or black paint. Drag it across the ceramic while twisting your wrist gently to form natural, uneven mineral veins.
- Feather the Edges: Gently smudge parts of the grey lines with a dry, soft brush to simulate depth inside stone.
- Apply Gold Leaf/Paint: Once grey paint dries completely, use liquid gold leaf or metallic gold enamel to trace thin accent lines alongside and across the marble veins.
- Topcoat: Protect the gilding with a clear, non-yellowing varnish.
Tips & Variations
- Deep Navy Base: Swap out white for deep midnight blue to make the gold veins pop with dramatic contrast.
- Minimalist Kintsugi: Skip the marble swirls and paint single, deliberate gold fracture lines across plain stoneware.
Needs & Materials
- Ceramic mug, platter, or planter
- Acrylic/Ceramic paint (Charcoal, Black, White)
- Metallic liquid gold paint or gold leaf kit
- Fine liner brush and natural feather
- Clear non-yellowing acrylic sealer
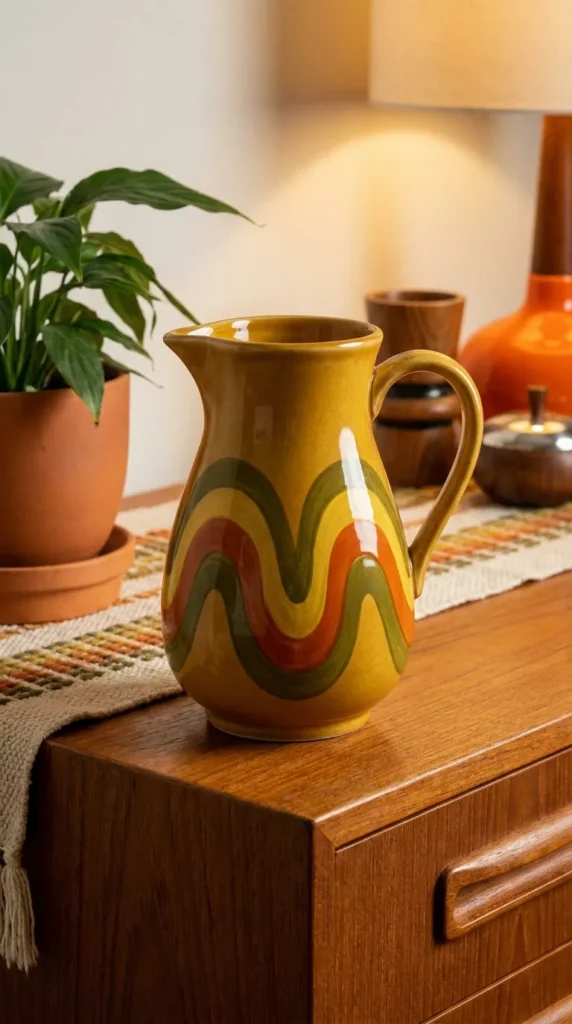
7. Groovy 70s Wavy Lines
What This Idea Means
Retro seventies design features continuous fluid curves, arching ribbons, and warm retro color palettes like mustard yellow, burnt orange, olive green, and chocolate brown. It brings rhythmic movement and playfulness to ceramics.
How to Make It
- Plan Color Palette: Choose 3–5 warm retro colors that contrast nicely against your vessel.
- Sketch Fluid Curves: Lightly trace undulating S-curves or parallel arching ribbons wrapping around the body of your vessel.
- Paint Ribbons: Using a medium round or flat angle brush, paint the broad color bands following your sketched curves smoothly.
- Layer Neighboring Colors: Paint adjacent wavy lines closely alongside the first strand, matching its curve precisely.
- Clean & Polish: Use a clean, damp brush tip to wipe away wobble marks before the paint dries.
Tips & Variations
- Negative Space: Leave thick gaps of raw ceramic showing between colorful waves for a lighter, modern look.
- Monochrome Rainbow: Paint groovy arches using variations of a single color family (e.g., dark pink, dusty rose, blush).
Needs & Materials
- Ceramic vase, tumbler, or teapot
- Ceramic paint (Mustard, Burnt Orange, Olive Green, Brown)
- Angle flat brush or round liner brush
- Pencil and eraser
- Clear gloss finish
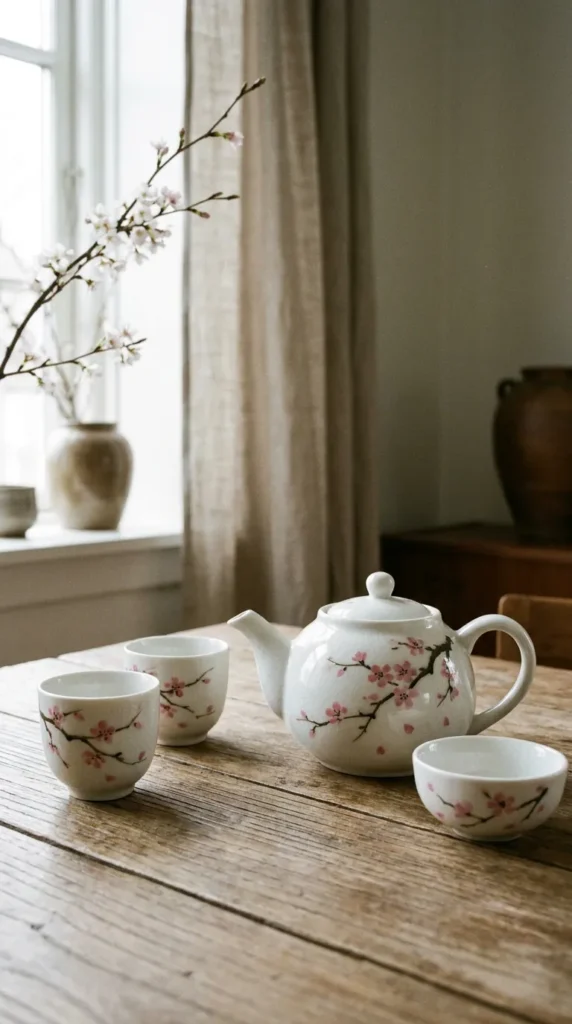
8. Delicate Cherry Blossom Branches
What This Idea Means
Inspired by traditional East Asian brush painting (Sumi-e), this motif features rustic dark branches dotted with soft pink and white cherry blossoms (sakura). It produces a serene, minimalist, and timeless aesthetic.
How to Make It
- Paint Branches: Using dark brown or black paint on a fine detail brush, paint thin, jagged, branching lines across your ceramic piece. Vary brush pressure to make branches thick at the base and whispy at the tips.
- Paint Petals: Use a small round brush dipped in soft pink paint. Dab five small oval dots in clusters around the thin branch tips to form blossoms.
- Add Flower Centers: Place a tiny dot of darker magenta or deep burgundy in the center of each blossom.
- Add Buds & Falling Petals: Add tiny standalone pink dots floating away from branches to give the impression of wind blowing blossoms away.
- Seal: Protect with a high-shine clear glaze.
Tips & Variations
- Ink-Wash Effect: Thin out black paint with glaze medium so branches look like delicate ink washes on rice paper.
- White on Terracotta: Paint white cherry blossoms directly onto unglazed terracotta for a rustic, earthy look.
Needs & Materials
- Ceramic tea set, pitcher, or vase
- Ceramic/Acrylic paints (Dark Brown, Soft Pink, Magenta, White)
- Fine liner brush (#00) and small round brush
- Clear protective seal
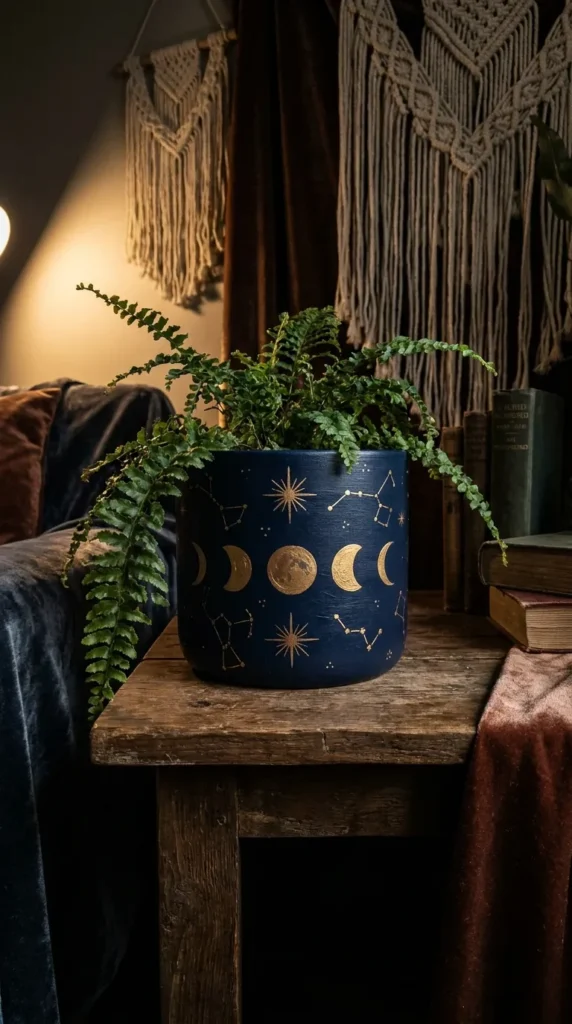
9. Celestial Constellations & Gold Stars
What This Idea Means
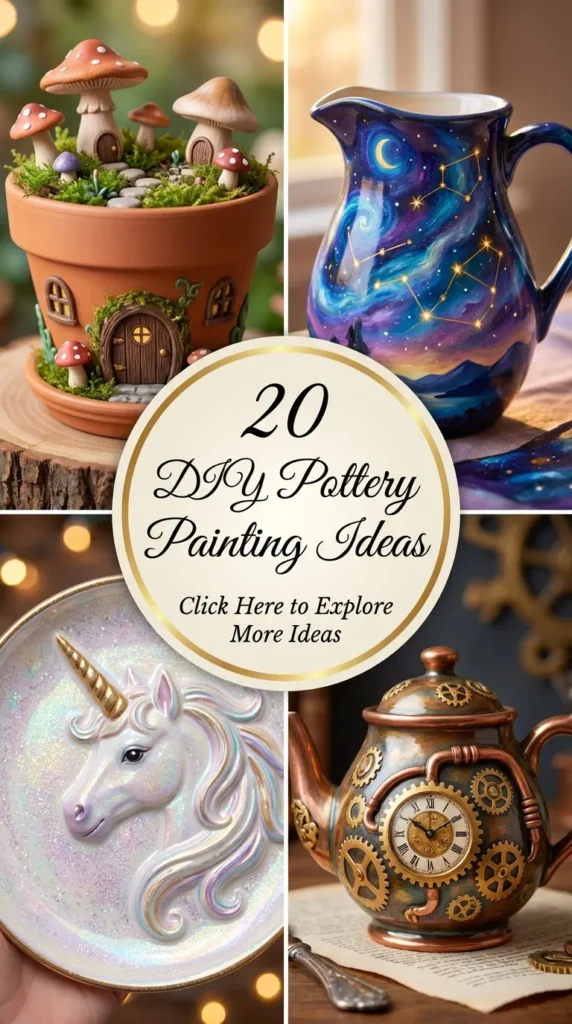
This dreamlike design brings the night sky indoors. Deep midnight blue, dark navy, or charcoal black ceramics are accented with hand-painted gold starbursts, moon phases, and delicate stellar constellations.
How to Make It
- Base Layer: Paint your ceramic piece in dark navy blue or black. Let dry completely.
- Create Nebula Mist (Optional): Lightly dab a sea sponge with dark purple and teal paint over parts of the dark base to simulate deep space depth.
- Paint Moons & Suns: Use bright gold paint to draw crescent moons, full moons, or stylized suns in central areas.
- Dot Constellations: Draw tiny white dots using a fine tool, then join them with whisp-thin white or gold lines to outline famous constellations (e.g., Ursa Major, Cassiopeia).
- Add Starbursts: Paint four-point stars and tiny flecks across the remaining space using gold metallic paint.
Tips & Variations
- Glow in the Dark: Mix a small amount of luminescent glow pigment into white star dots for a hidden magical effect when lights turn off.
- Zodiac Personalization: Paint custom zodiac constellations as tailored birthday gifts for friends.
Needs & Materials
- Dark navy or black ceramic piece (or white ceramic + dark paint)
- Acrylic/Ceramic paint (Navy, Purple, Gold, White)
- Sea sponge, dotting tool, and fine liner brush (#000)
- High-gloss topcoat
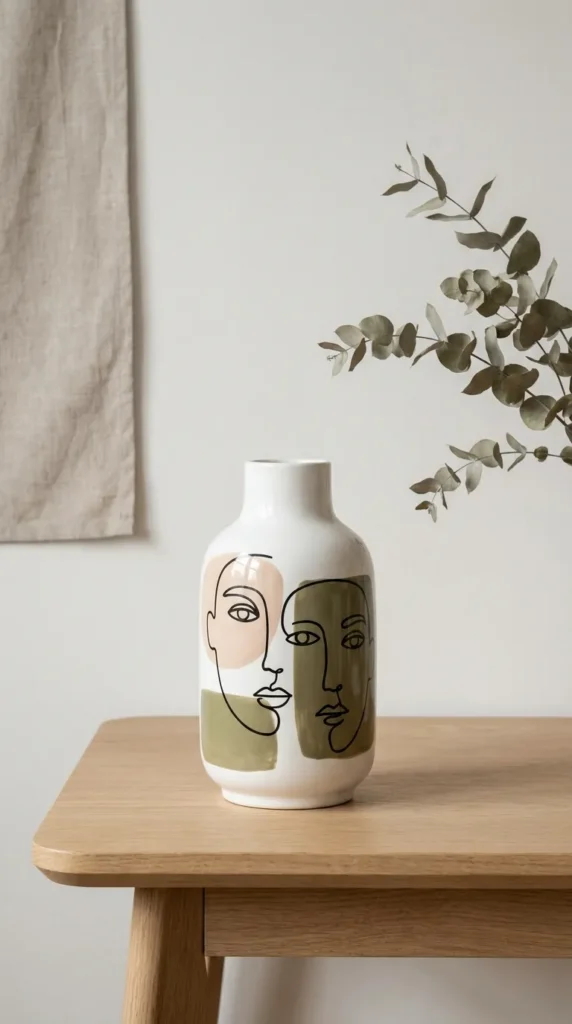
10. Abstract Face Line Art
What This Idea Means
Continuous line art faces draw heavy inspiration from Matisse and Picasso. This modern design uses single, fluid black lines to trace human profiles, abstract eyes, and lips over simple continuous blocks of neutral background colors.
How to Make It
- Paint Color Blocks: Paint 2–3 organic, blob-like background shapes across your vessel in nude, terracotta, mustard, or olive tones. Allow them to dry.
- Practice Your Line: Practice drawing single-line faces on scrap paper before touching the ceramic to build muscle memory.
- Sketch Lightly: Lightly trace the line art face across your color blocks with a graphite pencil.
- Paint the Line: Using black ceramic paint and a liner brush, paint the continuous line smoothly without lifting your brush too often. Keep pressure consistent.
- Seal: Apply a matte clear varnish for an artistic gallery feel.
Tips & Variations
- 3D Wire Look: Use a medium-thick paint stroke to give the continuous black line a heavy, graphic impact.
- Gold Line Art: Swap black paint for brilliant metallic liquid gold over dark forest green background blocks.
Needs & Materials
- Clean white ceramic vase, plate, or mug
- Ceramic paints (Nude, Olive, Terracotta, Jet Black)
- Fine round liner brush (#0)
- Soft pencil and rubber eraser
- Matte varnish spray or brush-on coat
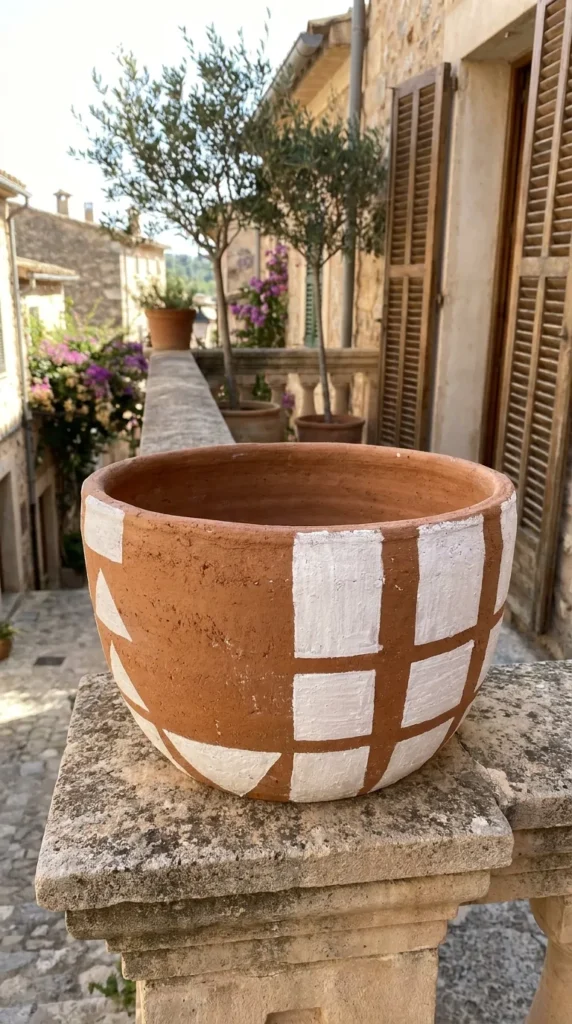
11. Earthy Terracotta & White Geometric Blocks
What This Idea Means
Combining rustic raw terracotta texture with crisp, opaque white geometric shapes creates a stunning architectural contrast. It blends mid-century modern aesthetic with warm, Mediterranean earthiness.
How to Make It
- Clean Raw Terracotta: Ensure your unglazed terracotta planter or pot is completely dust-free.
- Tape Off Sections: Use low-tack painter’s tape to create crisp geometric boundaries (triangles, half-circles, diagonal blocks).
- Apply White Base: Paint two to three thick coats of bright white ceramic or masonry acrylic paint inside taped boundaries.
- Remove Tape Carefully: Pull tape away while the final coat is still slightly damp to achieve crisp, razor-sharp edges.
- Detailing: Paint thin terracotta-colored dots or strokes over the white blocks for added visual texture.
Tips & Variations
- Sage & Terracotta: Add a second block color like soft sage green alongside white to expand the architectural palette.
- Raw Texture Contrast: Leave half the clay unpainted and unvarnished while applying a high-gloss glaze over white painted sections.
Needs & Materials
- Unglazed terracotta planter or bowl
- Low-tack painter’s tape
- Heavy-body white acrylic or ceramic paint
- Flat synthetic brush
- Matte or gloss sealer
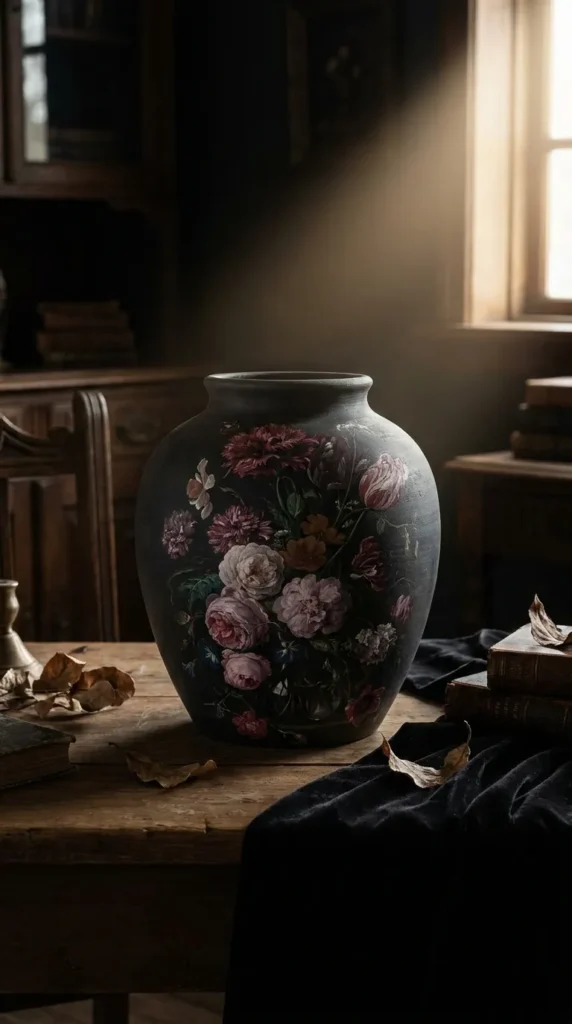
12. Moody Dark Floral Tapestry
What This Idea Means
Emulating Dutch Golden Age still-life oil paintings, this aesthetic features lush, dramatic blooms (peonies, roses, anemones) painted in moody burgundy, dusty mauve, and deep red against a dark, dramatic backdrop.
How to Make It
- Dark Background: Paint your ceramic piece matte black, deep charcoal, or dark hunter green.
- Block Flower Outlines: Paint dark plum or dark red circular bases where your flower heads will sit.
- Layer Petals: Using a small round brush, build petals working from the outer edges inward. Use lighter pinks, blush, and cream shades to overlap dark base layers.
- Add Leaf & Vine Accents: Tuck deep olive green leaves and trailing stems behind flower heads to integrate blooms into the dark background.
- Highlight Centers: Add fine yellow and white stamen dots in flower centers.
Tips & Variations
- Vintage Glaze: Apply an antique amber-tinted clear coat over finished painting to give it an authentic aged museum look.
- Minimalist Moody: Paint a single large dramatic dark peony on one side of a dark vessel, leaving the rest dark and plain.
Needs & Materials
- Dark ceramic mug, vase, or decorative plate
- Acrylic/Ceramic paints (Black, Plum, Burgundy, Blush, Olive Green)
- Round detail brushes (#1, #2)
- Clear protective glaze
13. Mediterranean Citrus & Olive Sprigs
What This Idea Means
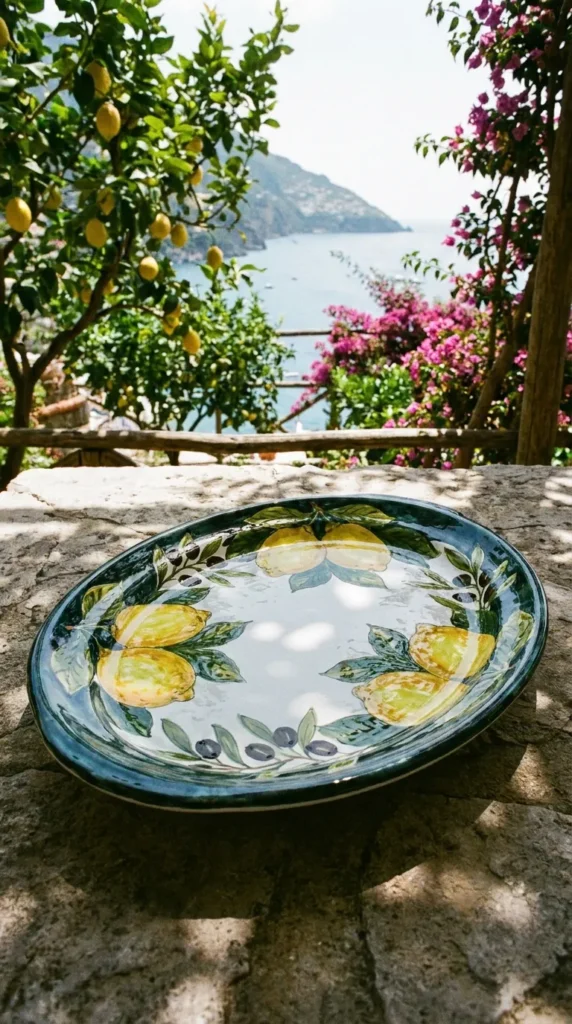
Bright lemon branches, vibrant oranges, and silvery olive sprigs bring the sunny warmth of the Amalfi Coast and Tuscan countryside right to your ceramic tableware.
How to Make It
- Sketch Composition: Lightly pencil in clusters of lemons/oranges with accompanying leafy stems around the body of your vessel.
- Paint Fruit Bases: Fill lemon and orange shapes with bright yellow and vibrant orange paint. Apply two coats for solid coverage.
- Add Fruit Shading: Blend a tiny brushful of warm ochre or green onto one side of each lemon to create dimensional depth.
- Paint Foliage: Draw dark olive leaves and brown wooden twigs connecting the fruit clusters together into a continuous garland.
- Add Tiny Highlights: Put a small curve of bright white on each fruit to make it look fresh and glossy.
Tips & Variations
- Majolica Blue Border: Add a traditional Italian blue decorative tiled pattern border around the rim of your platter or bowl.
- Cut Fruit Detail: Paint sliced lemons showing intricate white pith and translucent fruit segments.
Needs & Materials
- White ceramic platter, pitcher, or pasta bowl
- Acrylic/Ceramic paint (Bright Yellow, Orange, Olive Green, Brown, White)
- Medium round brush and fine detail brush
- High-gloss clear sealant
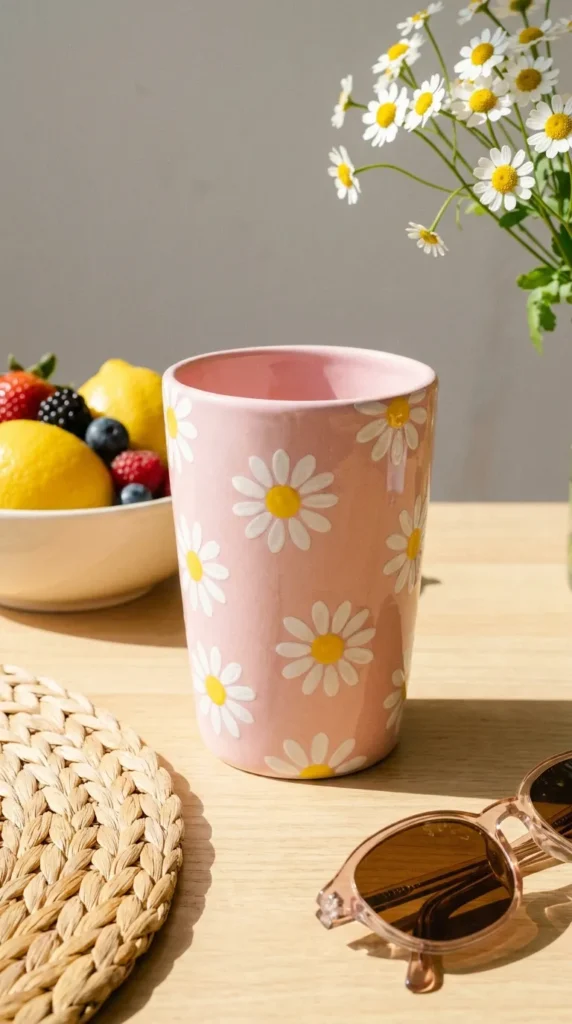
14. Retro Daisy Flower Field
What This Idea Means
Cheerful, sweet, and uncomplicated, retro daisy fields are full of nostalgic 60s and 70s charm. Simple white petals around bright yellow centers arranged closely together create an inviting pattern.
How to Make It
- Choose Background Color: Soft pastel pink, sky blue, or mint green backgrounds complement white daisies beautifully. Paint base and let dry.
- Paint Flower Centers: Use a dotting tool or brush handle end dipped in bright yellow paint to stamp evenly spaced dots across the piece.
- Add Petals: Using a fine round brush dipped in white paint, pull short teardrop strokes outwards from each yellow center to create 5–8 simple petals per daisy.
- Scatter Sizes: Paint a mix of larger central daisies and tiny mini daisies filling empty gaps.
- Seal: Protect your cheerful pattern with a glossy finish coat.
Tips & Variations
- Multicolored Daisies: Keep flower centers yellow, but alternate petal colors between pastel lavender, sage, and peach.
- Stems & Leaves: Connect daisies with delicate wavy green stems for a wildflower field look.
Needs & Materials
- Ceramic tumbler, mug, or coaster
- Ceramic paint (Pastel base, White, Bright Yellow)
- Fine round brush (#1) and wooden dotting tool
- Clear gloss sealant
15. Ocean Wave Drip Glaze Effect
What This Idea Means
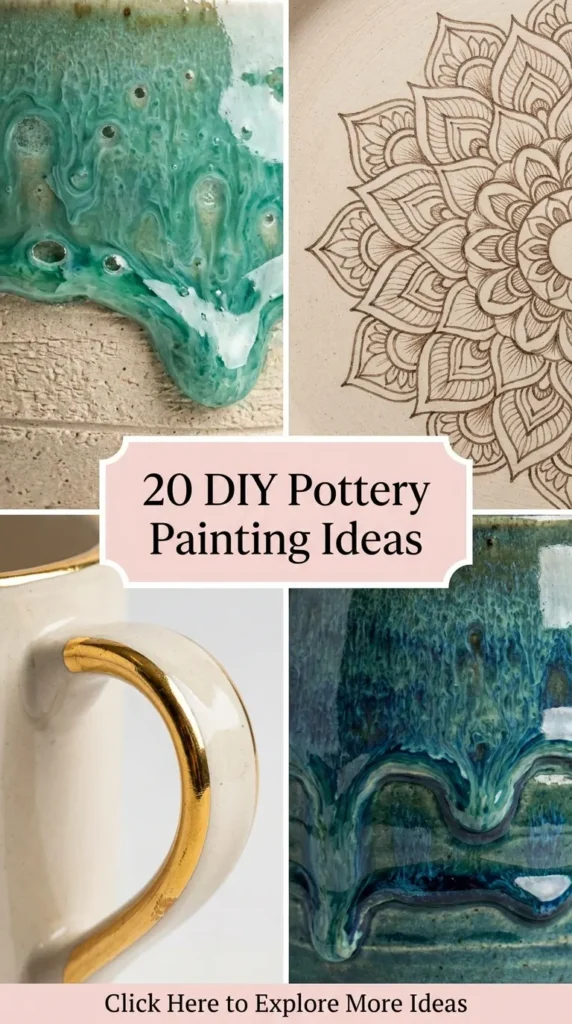
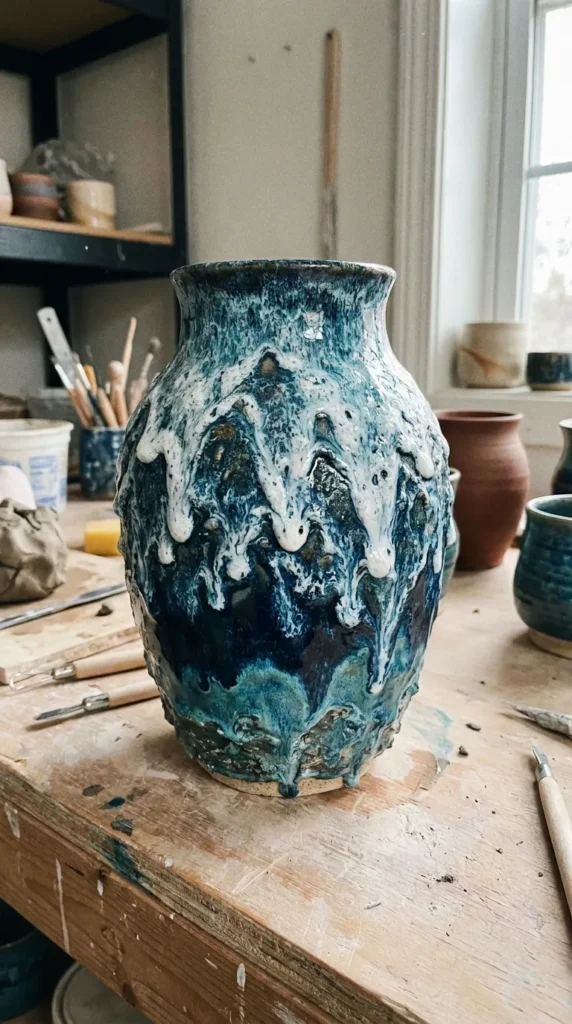
Recreating the dynamic movement of sea foam, oceanic crests, and deep water currents using gravity and layered paint runs. This technique produces one-of-a-kind organic patterns on every piece.
How to Make It
- Prepare Top Ring: Elevate your ceramic vessel on an inverted cup over a catch tray.
- Apply Base Shade: Paint the lower half of your vessel in a deep navy or teal shade.
- Apply Heavy Top Layer: While base paint is wet, apply generous, thick layers of lighter turquoise, sky blue, and white glazes around the top rim.
- Encourage Drips: Tilt the vessel or blow gently through a straw to force thick paint layers down over the dark base, creating organic running drips.
- Simulate Sea Foam: Flick white ceramic paint flecks over dripping areas to create sea foam texture.
- Dry & Seal: Allow to dry right-side up so drips settle naturally, then seal.
Tips & Variations
- Sand Base Accent: Paint the bottom third of your ceramic piece in textured beige sand paint to complete an ocean beach scene.
- Heat Gun Movement: Use a hair dryer on low speed to gently push dripping paint sideways, creating swirling wave action.
Needs & Materials
- Ceramic vase or planter
- Fluid ceramic glazes or acrylics (Navy, Teal, Turquoise, White)
- Catch tray and plastic cup (for elevating)
- Drinking straw or low-power hairdryer
- High-gloss seal
16. Monochrome Speckled Granite Look
What This Idea Means
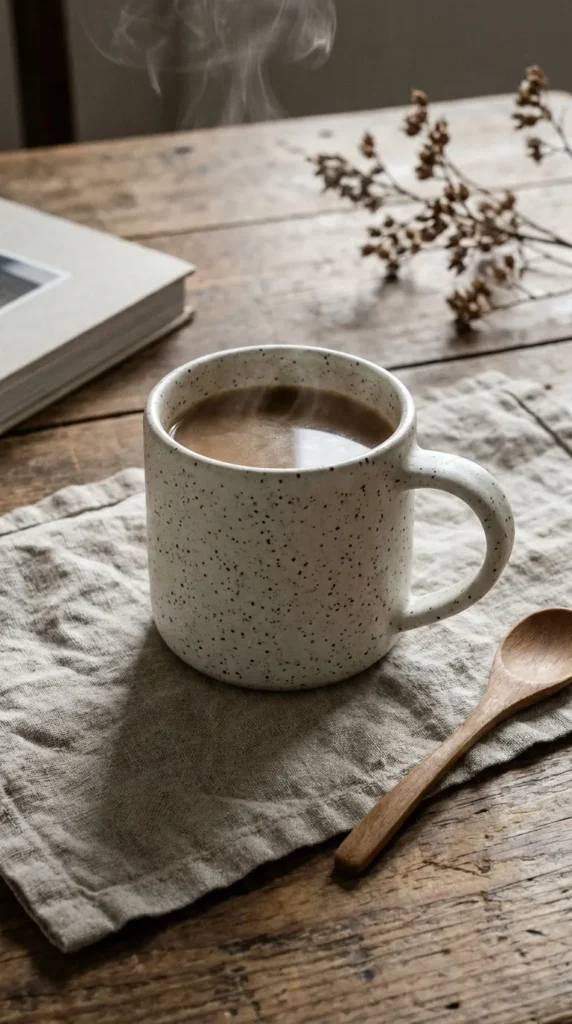
Clean, contemporary, and earthy, this monochrome design mimics high-end speckled stone pottery or Scandinavian granite tableware.
How to Make It
- Base Coat: Coat your ceramic piece in matte grey, light stone, or off-white paint.
- Prepare Flicking Mixture: Dilute jet black paint with a small amount of water or medium until it reaches a watery, milk-like consistency.
- Flick Paint Speckles: Dip a stiff-bristled toothbrush or fan brush into diluted black paint. Hold brush near ceramic and drag your thumb back across bristles to spray tiny speckles across the vessel.
- Vary Density: Apply denser speckles near the base of the piece and lighter flecks near top edges.
- Finish: Seal with a ultra-matte varnish coat to maintain a natural unglazed stone feel.
Tips & Variations
- Dual Flecks: Flick both dark charcoal and crisp white speckles over a mid-tone taupe base coat for deeper stone texture.
- Dip-Dyed Rim: Paint the top 1 inch of your speckled ceramic piece solid black for a striking geometric accent.
Needs & Materials
- Ceramic mug, plate, or planter
- Ceramic paint (Stone Grey/Off-White, Jet Black)
- Stiff toothbrush or fan brush
- Matte sealant spray
17. Pressed Fern & Shadow Leaf Silhouette
What This Idea Means
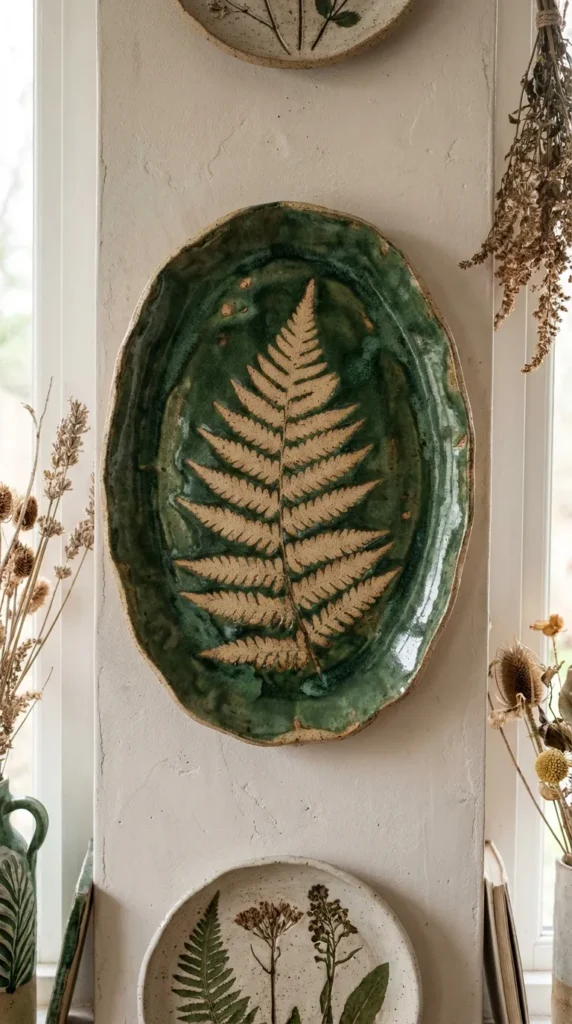
This negative-space technique uses real dried leaves or paper cutouts as stencils to leave behind precise silhouettes surrounded by soft color washes or bold contrast shades.
How to Make It
- Prepare Fern/Leaf: Find a flat fern frond or pressed leaf. Slightly dampen back side with water so it clings temporarily to ceramic surface.
- Position Stencil: Press leaf firmly onto clean ceramic surface, smoothing down all delicate leaf tips.
- Paint Over Stencil: Sponge or paint your chosen ceramic color over entire surface, covering both bare ceramic and leaf edges completely.
- Peel Leaf Away: While paint is still tacky, carefully peel fern away using tweezers to reveal clean white silhouette underneath.
- Touch Up Edges: Clean up any paint bleeding under edges with a damp fine brush.
- Seal: Seal piece with satin varnish.
Tips & Variations
- Sponged Gradient: Sponge paint in a dark-to-light gradient over stencil edges to give silhouette a soft glowing halo effect.
- Double Exposure: Paint delicate veins inside the white leaf silhouette after removing stencil.
Needs & Materials
- Ceramic vase or wall hanging plate
- Real pressed fern/leaves or custom paper cutouts
- Ceramic or acrylic paint
- Sea sponge or stippling brush
- Tweezers and clear sealer
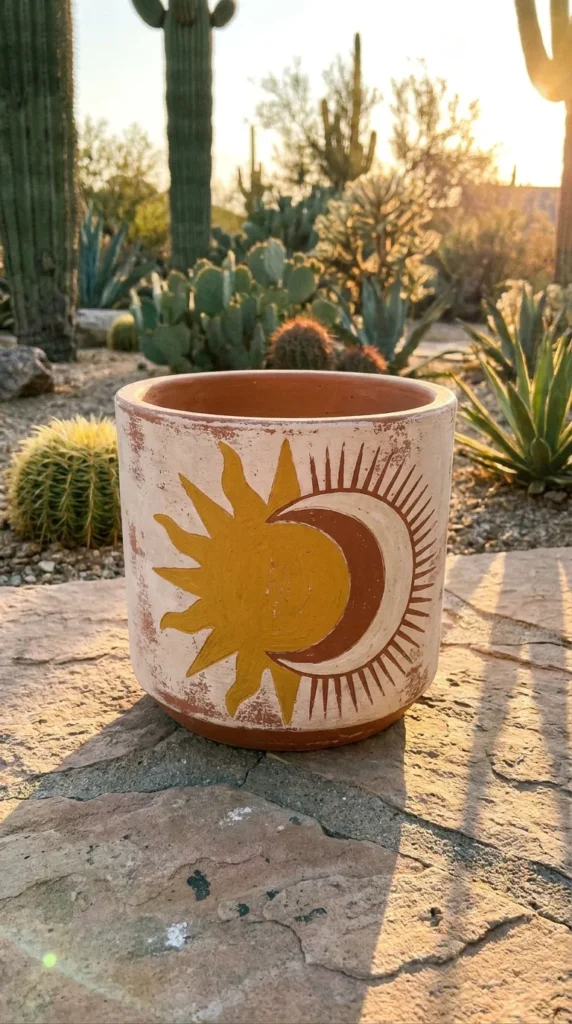
18. Sun & Crescent Moon Boho Eclipse
What This Idea Means
Bohemian design relies on celestial iconography, warm desert color palettes (mustard, terracotta, beige, rust), and clean minimalist geometry.
How to Make It
- Sketch Center Shapes: Trace a central circle on your ceramic vessel using a small glass or compass. Add a crescent moon overlapping one side.
- Paint Celestial Bodies: Fill main sun circle with warm mustard yellow paint and crescent moon with deep terracotta or rust brown.
- Draw Sun Rays: Extend clean, straight lines or geometric triangles outward from sun center using a fine liner brush and ruler.
- Add Boho Dots & Arches: Accent design by painting concentric arching lines and tiny accent dots framing eclipse motif.
- Seal: Protect with a soft matte varnish.
Tips & Variations
- Terracotta Canvas: Paint sun and moon design directly onto raw unglazed terracotta for authentic desert boho style.
- Gold Accent Rays: Paint alternating sun rays with liquid gold paint to add subtle shimmer.
Needs & Materials
- Ceramic planter or wall hanging plate
- Acrylic/Ceramic paint (Mustard, Rust, Terracotta, White)
- Fine liner brush (#0) and small flat brush
- Pencil and small circle stencil/compass
- Matte clear sealer
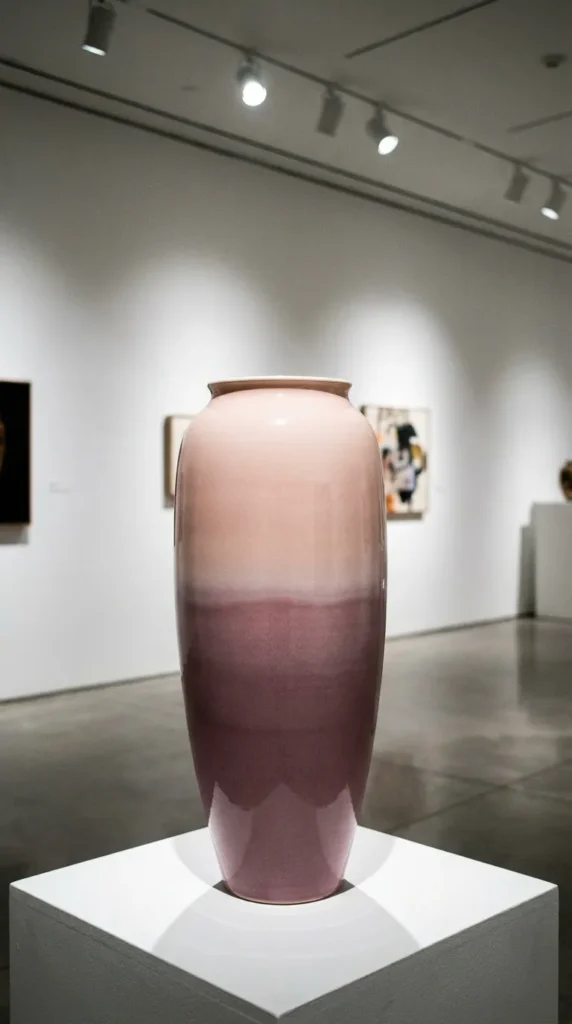
19. Soft Ombré Horizon Gradient
What This Idea Means
An ombré gradient seamlessly transitions one color smoothly into another. Inspired by twilight skies and misty horizon landscapes, it brings calming aesthetic balance to ceramic pieces.
How to Make It
- Apply Two Primary Colors: Paint top half of vessel in light color (e.g., blush pink) and bottom half in darker color (e.g., deep mauve).
- Blend Transition Zone: While both paint sections are wet, paint middle boundary area using a 50/50 mix of both colors.
- Smooth with Sponge: Gently dab a damp sea sponge across middle transition boundary to blur sharp lines, blending shades together.
- Feather Strokes: Use soft horizontal strokes with a dry fan brush to smooth out sponge textures until gradient looks seamless.
- Seal: Apply gloss glaze to enhance color depth.
Tips & Variations
- Three-Tone Sunset: Create three-tier gradient transitioning from golden yellow at top, to dusty orange in middle, down to plum purple at base.
- Mountain Silhouette: Once ombré background dries, paint simple dark mountain range silhouettes across bottom edge.
Needs & Materials
- Tall ceramic vase or tumbler
- Ceramic paints (Two or three blending shades)
- Soft fan brush and sea sponge
- Glossy topcoat
20. Vintage Ceramic Strawberry Stamp
What This Idea Means
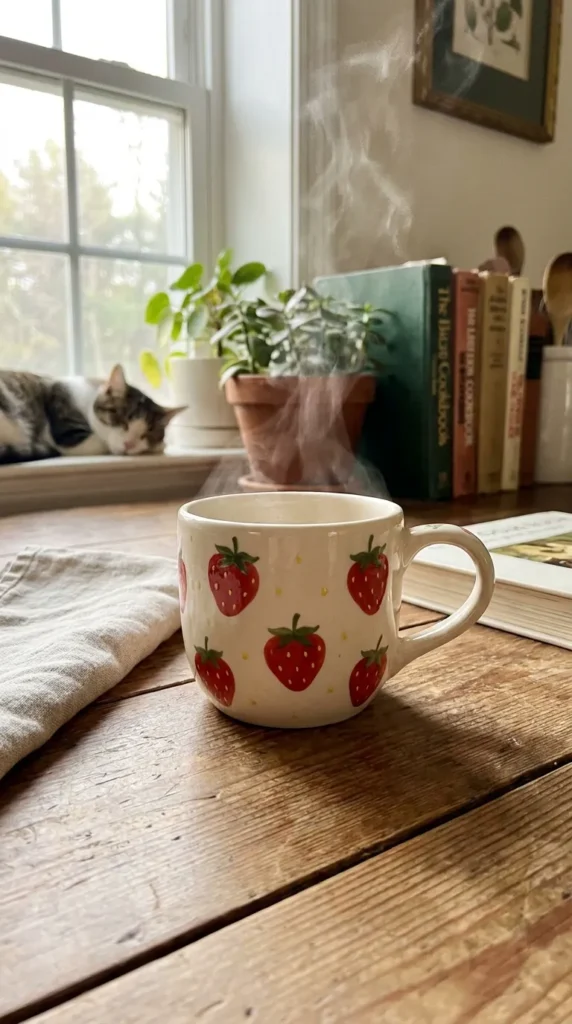
Nostalgic kitchenware aesthetics often celebrate fruit patterns. Painting cute, vintage-style strawberries with delicate seeds and green caps across ceramic dishes creates sweet charm for daily tea time.
How to Make It
- Paint Strawberry Bodies: Paint heart-shaped plump red teardrops randomly distributed across your ceramic piece. Apply two coats for vibrant coverage.
- Add Green Leaves: Using a fine detail brush and forest green paint, add 3–4 tiny pointed leaf caps on top of each strawberry.
- Add Tiny Stems: Extend a thin green stem curve upward from top of leaf caps.
- Paint Seed Details: Using a tiny dotting tool or toothpick end dipped in soft yellow or white paint, place tiny seeds across red strawberry bodies.
- Seal: Apply high-shine clear glaze.
Tips & Variations
- Matching Vine Trailing: Connect scattered strawberries with delicate swirling green leafy vines wrapping around mug handles.
- Pink Strawberries: Paint strawberries in soft pastel pink for modern pastel cottagecore aesthetic.
Needs & Materials
- Ceramic mug, pitcher, or berry bowl
- Ceramic paint (Vibrant Red, Forest Green, Pastel Yellow/White)
- Fine detail brush (#0) and toothpick/dotting tool
- Clear gloss sealant
Summary Overview & Quick Comparison
| Idea # | Pattern / Style | Primary Color Palette | Difficulty Level | Ideal Ceramic Vessel |
| 1 | Soft Botanical Leaf Prints | Sage Green, Taupe, Warm White | Beginner | Mugs, Planters |
| 2 | Minimalist Terrazzo Speckles | Rust, Sage, Ochre, White | Beginner | Trays, Coasters |
| 3 | Pastel Watercolor Wash | Lavender, Sky Blue, Peach | Intermediate | Bowls, Plates |
| 4 | Checkerboard Grid | Butter Yellow, Forest Green, Cream | Intermediate | Trays, Mugs |
| 5 | Cottagecore Mushroom | Terracotta Red, Cream, Moss Green | Intermediate | Bowls, Mugs |
| 6 | Golden Gilded Marble | Charcoal Grey, White, Metallic Gold | Advanced | Vases, Platters |
| 7 | Groovy 70s Wavy Lines | Mustard Yellow, Burnt Orange, Brown | Beginner | Vases, Tumblers |
| 8 | Cherry Blossom Branches | Dark Brown, Soft Pink, Magenta | Intermediate | Tea Sets, Vases |
| 9 | Celestial Constellations | Navy Blue, Metallic Gold, White | Intermediate | Mugs, Planters |
| 10 | Abstract Face Line Art | Nude, Olive Green, Jet Black | Intermediate | Vases, Plates |
| 11 | Terracotta Geometric Blocks | Raw Terracotta, Crisp White, Sage | Beginner | Planters, Bowls |
| 12 | Moody Dark Floral | Plum, Burgundy, Blush, Black | Advanced | Vases, Platters |
| 13 | Mediterranean Citrus | Bright Yellow, Orange, Olive Green | Intermediate | Platters, Pitchers |
| 14 | Retro Daisy Field | Pastel Pink, Bright Yellow, White | Beginner | Tumblers, Coasters |
| 15 | Ocean Wave Drip Glaze | Deep Navy, Teal, Sky Blue, White | Intermediate | Vases, Pots |
| 16 | Monochrome Speckled Granite | Stone Grey, Jet Black, Off-White | Beginner | Mugs, Planters |
| 17 | Pressed Fern Silhouette | Forest Green, Cream White | Intermediate | Wall Plates, Vases |
| 18 | Sun & Moon Boho Eclipse | Mustard, Rust, Terracotta, White | Intermediate | Planters, Wall Plates |
| 19 | Soft Ombré Horizon | Blush Pink, Mauve, Deep Purple | Intermediate | Tall Vases |
| 20 | Vintage Ceramic Strawberry | Vibrant Red, Forest Green, Yellow | Beginner |