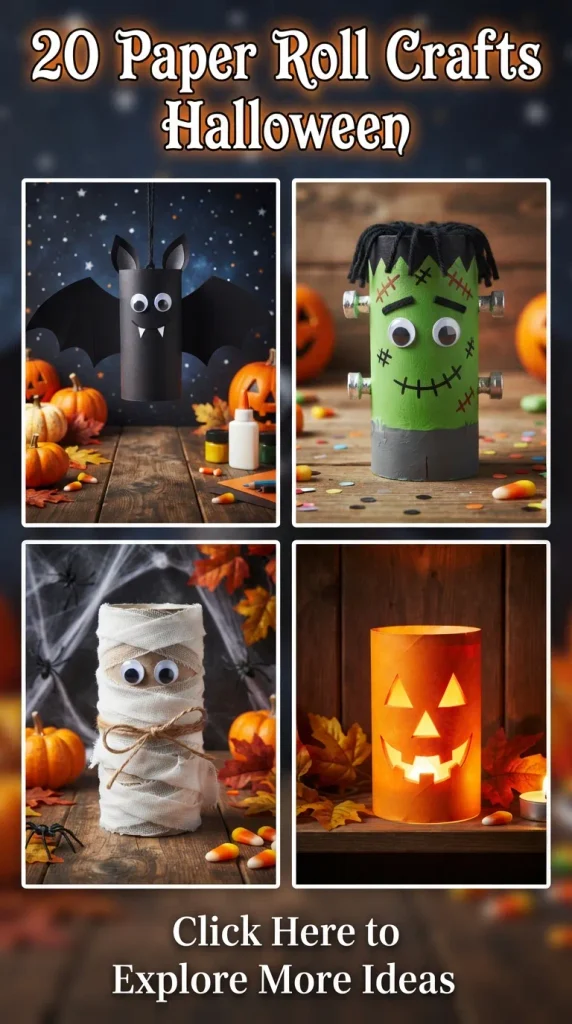
The autumn wind begins to whisper through the trees, the evenings draw in earlier, and a familiar, enchanting chill settles over the neighborhood. Halloween approaches, bringing with it the irresistible urge to transform our living spaces into cozy, spellbinding sanctuaries of wonder. You do not need a bottomless budget or a trip to a specialty boutique to achieve that hauntingly elegant aesthetic. Sometimes, the most magical transformations begin with the humblest everyday objects sitting right in your recycling bin.
Toilet paper rolls—often discarded without a second thought—represent one of the most versatile, eco-friendly, and surprisingly sophisticated crafting mediums available. Far from the crude cardboard tubes of childhood grade-school projects, these cylindrical wonders can be shaped, painted, gilded, and sculpted into breathtaking works of seasonal art. Whether you lean toward a whimsical farmhouse vibe, a moody gothic romance, or a sleek, minimalist modern Halloween decor style, these simple cardboard tubes offer endless potential.
Unlocking this creative potential requires little more than basic craft supplies, a bit of imagination, and a willingness to look at ordinary household items through an artistic lens. Every single one of these twenty distinct projects invites you to slow down, embrace the tactile joy of handmade artistry, and infuse your home with a bespoke elegance that mass-produced decorations simply cannot replicate.
Gather your supplies, clear off your work table, and let us explore twenty breathtaking toilet paper roll crafts designed to elevate your Halloween aesthetic.
1. Gilded Metallic Skull Luminaries
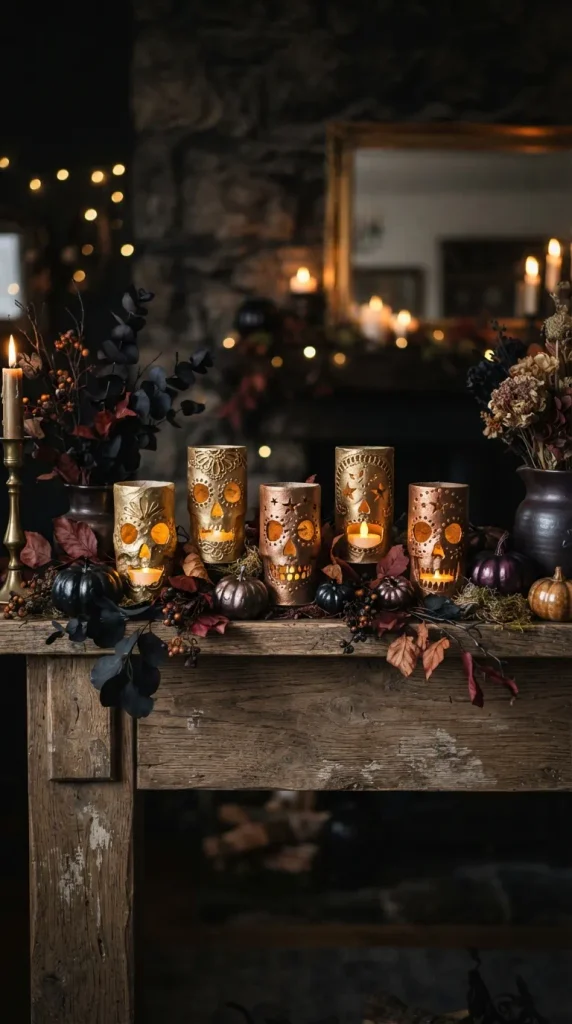
Transforming ordinary cardboard into gleaming, antiqued metal creates an effortlessly chic Halloween accent. By cutting intricate eye sockets and skeletal grins into the upper portion of a flattened and reshaped roll, you build the foundation of an eerie skull silhouette.
What You Need:
- Toilet paper rolls
- Matte black acrylic paint
- Metallic gold or copper leafing liquid
- Sharp craft knife
- Battery-operated tea lights
How to Make It: Begin by painting the entire exterior of the toilet paper roll in a dense, matte black acrylic. Allow it to dry completely. Fold the top edge inward to create a rounded, skull-like dome. Using a sharp craft knife, carefully carve out hollow eye sockets, a triangular nose cavity, and a row of stitched teeth across the lower third. Once the structural carving is complete, take a fine brush and apply metallic gold or copper leafing liquid along the edges of the cuts and across the forehead to mimic aged, oxidized precious metal. Place a safe, battery-operated tea light underneath the tube to cast a warm, flickering amber glow through the carved features.
Tips and Variations: For an alternative finish, swap the gold leafing for antique silver or iridescent mother-of-pearl paint to achieve a ghostly, ethereal luminescence that stands out brilliantly against dark autumnal displays.

2. Velvet-Wrapped Midnight Bats
Floating gracefully across a living room wall or suspended from a rustic branch centerpiece, these tactile bats offer a moody, sophisticated twist on classic flying creatures.
What You Need:
- Toilet paper rolls
- Scrap pieces of black velvet or sueded fabric
- Heavy black cardstock
- Fabric scissors
- Strong craft glue
How to Make It: Pinch the top ends of the toilet paper roll inward to create folded pointed tips that resemble bat ears. Wrap the central body tightly in black velvet or sueded fabric, securing the seams neatly with strong craft glue at the back. Cut dramatic, scalloped wing pairs out of heavy black cardstock, scoring the attachment tabs so they can be glued flush against the sides of the velvet-wrapped body. Add tiny, glossy black seed beads for eyes to catch the ambient light as they sway gently in the breeze.
Tips and Variations: Experiment with deep jewel tones like midnight sapphire, emerald, or rich burgundy velvet to bring a decadent Victorian gothic flair to your mantelscape.
3. Vintage Apothecary Poison Bottles
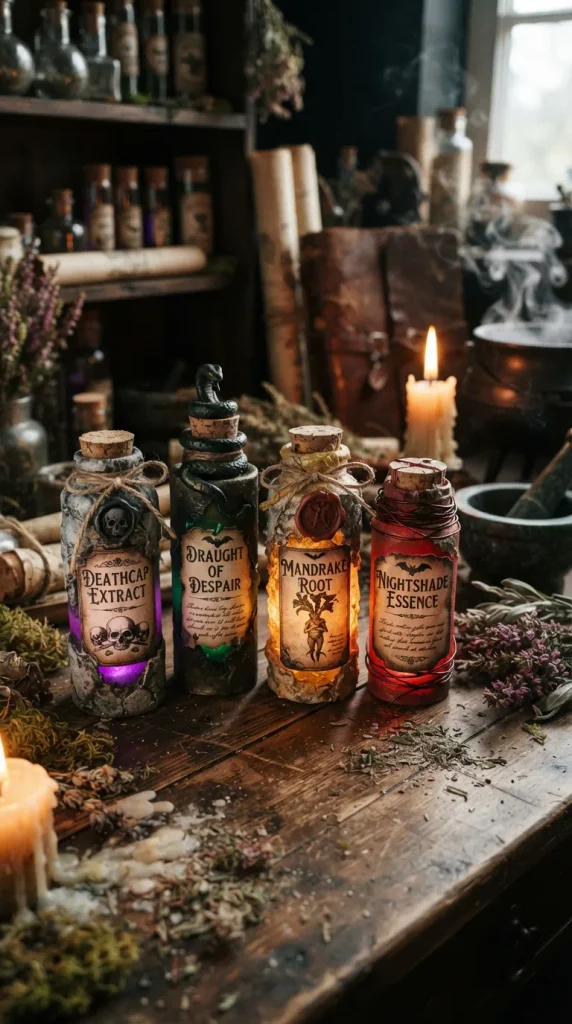
Creating the illusion of ancient, magical elixirs found in a wizard’s hidden study requires nothing more than clever manipulation of cardboard tubes and textured paint techniques.
What You Need:
- Toilet paper rolls
- Cardboard circles for bases
- Hot glue gun
- Textured stone-effect spray paint
- Printed vintage apothecary labels
- Twine and sealing wax
How to Make It: Glue a sturdy cardboard circle to the bottom of your toilet paper roll to create a sealed base. Scrunch up small bits of aluminum foil and hot glue them randomly across the surface of the tube to create the bumpy, organic imperfections of hand-blown, ancient glass. Spray the entire assembly with a stone-effect or hammered metal spray paint. Once dry, wrap a piece of aged parchment paper featuring a vintage poison label (such as “Nightshade Extract” or “Witch’s Brew”) around the center. Tie natural jute twine around the neck of the bottle, finishing it with a dollop of deep red sealing wax stamped with a crest.
Tips and Variations: Vary the heights of your bottles by cutting some rolls in half or joining two rolls together with tape before texturing to create a dynamic, layered apothecary shelf display.
4. Frosted Lace Spiderweb Cones
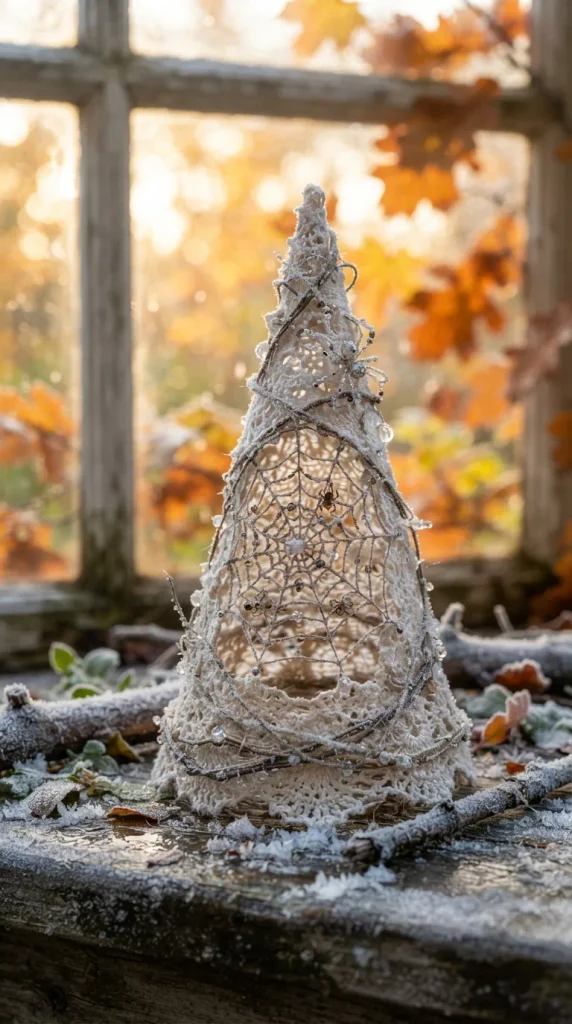
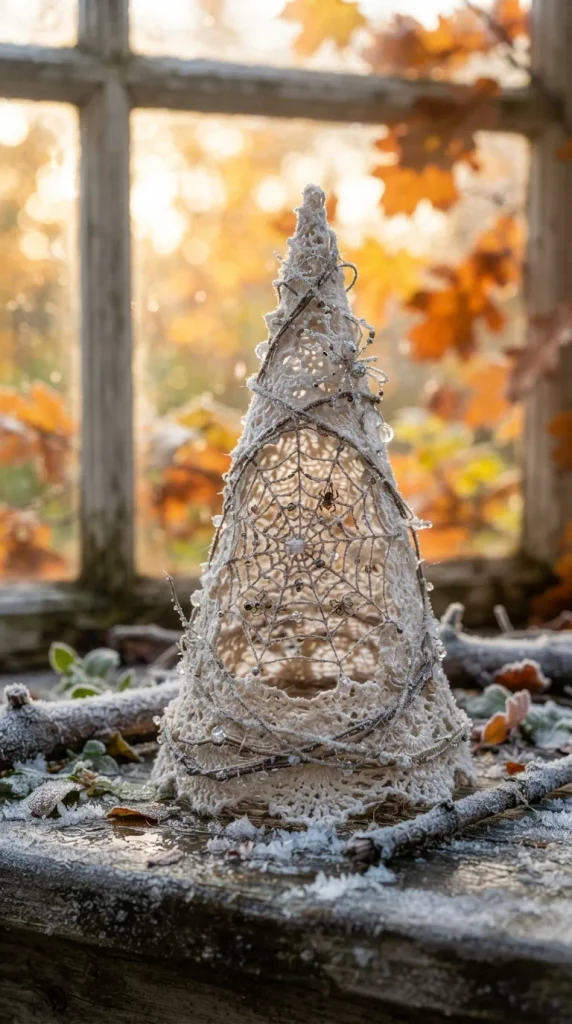
Delicate, ethereal, and surprisingly sturdy, these web cones catch the light beautifully on a windowsill or dining table centerpiece.
What You Need:
- Toilet paper rolls
- White school glue or Mod Podge
- Fine white crochet thread or yarn
- Cornstarch
- Plastic wrap
How to Make It: Wrap a toilet paper roll tightly in plastic wrap to ensure easy removal later. Mix equal parts white glue and cornstarch with a splash of water. Soak your crochet thread thoroughly in this adhesive mixture. Starting at the base, wrap the thread randomly around the plastic-wrapped tube to form an intricate, overlapping web pattern, leaving open spaces. Allow the entire structure to dry for a full twenty-four hours until completely rigid. Slide the hardened web cone off the plastic wrap, trim any stray glue threads, and dust lightly with iridescent white glitter for a frosty morning effect.
Tips and Variations: Spray paint the finished web cones with a coat of matte black paint, then highlight random strands with silver craft paint for a gothic spiderweb aesthetic.
5. Gothic Cathedral Pillar Candles
Melted wax, looming arches, and deep shadows define this striking, fire-safe alternative to traditional candles for your Halloween tablescape.
What You Need:
- Toilet paper rolls
- Lightweight joint compound or spackle
- Acrylic paint in ivory, charcoal, and sepia
- Hot glue gun
- LED pillar lights
How to Make It: Apply dabs of hot glue unevenly around the top rim of the toilet paper roll to mimic dripping, melting candle wax. Once cooled, coat the entire exterior of the tube with a thin layer of lightweight joint compound using a palette knife or your fingers to give it a heavy, plaster-like texture. Paint the dried surface in an antique ivory shade, then wash over the crevices with a watery sepia and charcoal glaze to simulate centuries of soot and age. Slide the hollow tube directly over a battery-operated LED pillar light.
Tips and Variations: Cluster three candles of varying heights together on an antique silver tray, tying them with frayed linen ribbon and dried autumn botanicals.

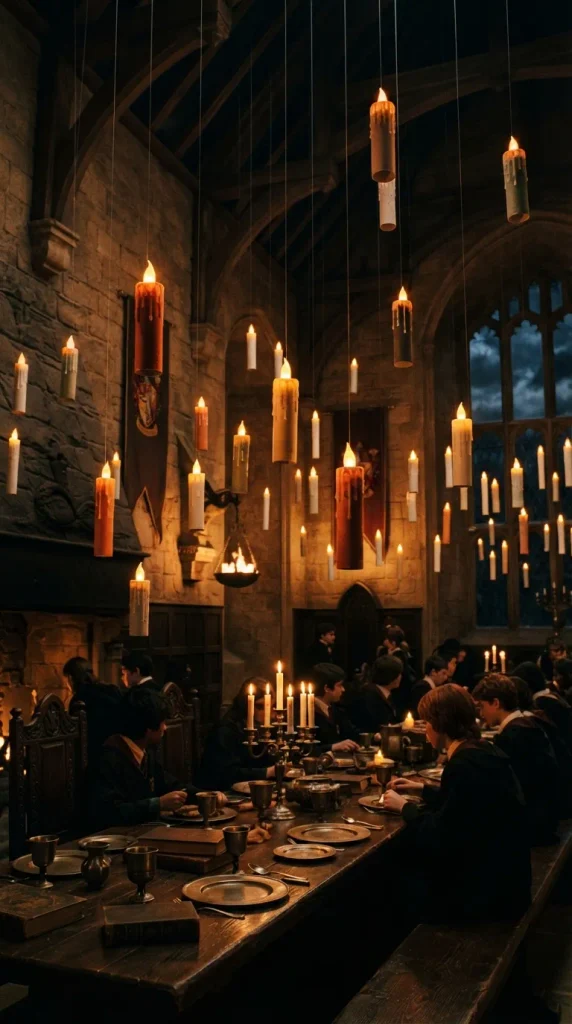
6. Floating Wizard Candles (Hogwarts Style)
Replicate the magic of the Great Hall by suspending glowing, floating candles from your ceiling using invisible fishing line and cardboard tubes.
What You Need:
- Toilet paper rolls
- White or cream acrylic paint
- Hot glue
- Transparent fishing line
- Small LED tea lights
How to Make It: Paint the outside of the toilet paper roll in an off-white or cream matte finish. Apply generous streams of hot glue running down from the top rim to mimic thick wax drips pooling down the sides. Paint over the dried hot glue with matching cream paint. Push a small battery-operated LED tea light snugly into the top opening of the tube, securing it with a small dab of tape or glue if necessary. Punch two small holes near the top rim, thread transparent fishing line through them, and hang them securely from ceiling hooks.
Tips and Variations: Use metallic copper or bronze paint for the wax drips instead of white to give the floating candles a steampunk or modern industrial edge.
7. Enchanted Poison Apple Shrines
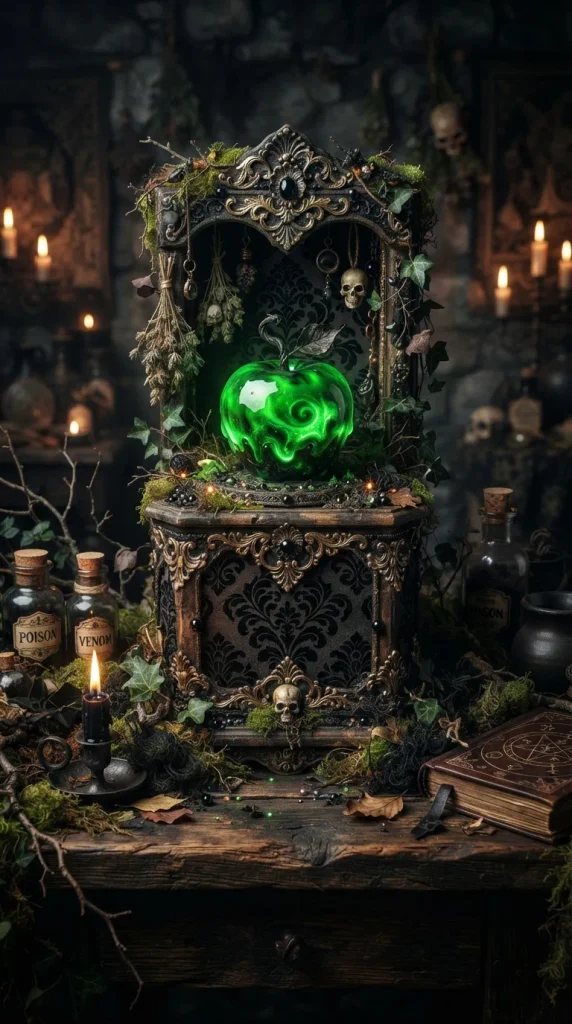
A tribute to classic fairy tale poison apples, these pedestals elevate a simple craft into a dramatic centerpiece display piece.
What You Need:
- Toilet paper rolls
- Small plastic or faux apples
- Glossy bright red or toxic green spray paint
- Twig branches
- Black cardstock
How to Make It: Trim a toilet paper roll down to a shorter height to act as a sturdy pedestal base. Wrap the exterior in textured black cardstock embossed with a subtle damask pattern. Spray paint a small faux apple in high-gloss toxic green or deep ruby red, letting the paint run slightly for a dramatic effect. Hot glue the finished apple securely to the top of the decorated cardboard pedestal. Insert a twisted natural twig and a small paper leaf into the top of the apple to complete the organic, spellbound look.
Tips and Variations: Surround the base of the pedestal with faux moss and tiny plastic skulls to anchor the scene into a full woodland witch’s altar display.
8. Steampunk Mechanical Pumpkin Sculptures
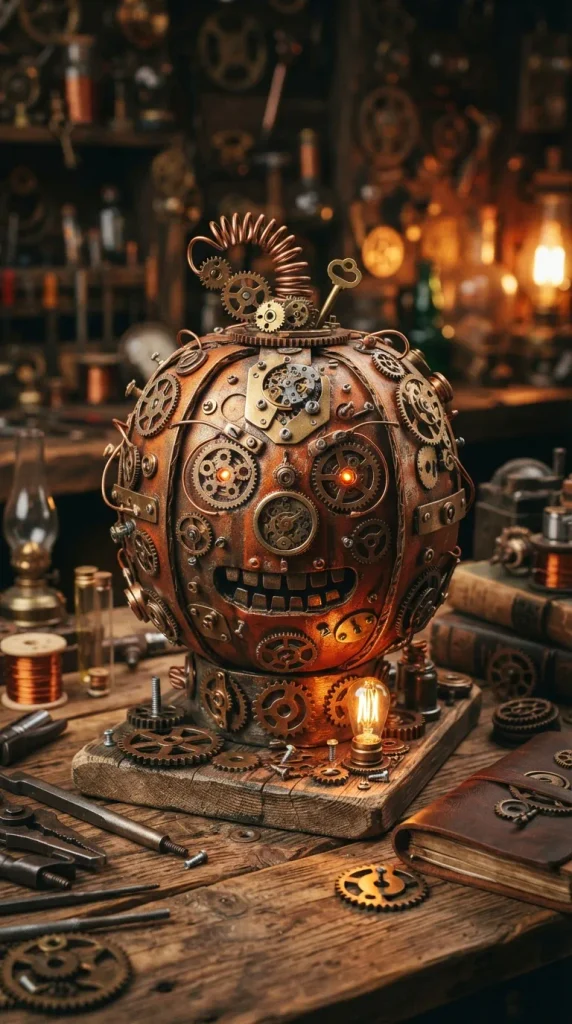
Moving away from traditional orange gourds, this mechanical pumpkin incorporates industrial gear elements and metallic finishes for a striking modern display.
What You Need:
- Toilet paper rolls
- Orange and bronze metallic acrylic paint
- Old watch gears, buttons, and hardware
- Twine
- Hot glue
How to Make It: Cut vertical slits down the length of a toilet paper roll, folding the top and bottom edges inward and gluing them into the hollow center to create a rounded, segmented pumpkin shape. Paint the entire formed pumpkin structure in a deep burnt orange, then dry-brush bronze and copper metallic paint over the ridges. Hot glue an assortment of small metal watch gears, cogs, and vintage buttons around the stem area. Finish the pumpkin by inserting a thick piece of copper wire or wrapped twine as the curly stem.
Tips and Variations: Paint the pumpkin in matte charcoal grey and silver for a futuristic, cyber-gothic pumpkin design that looks stunning in contemporary urban spaces.
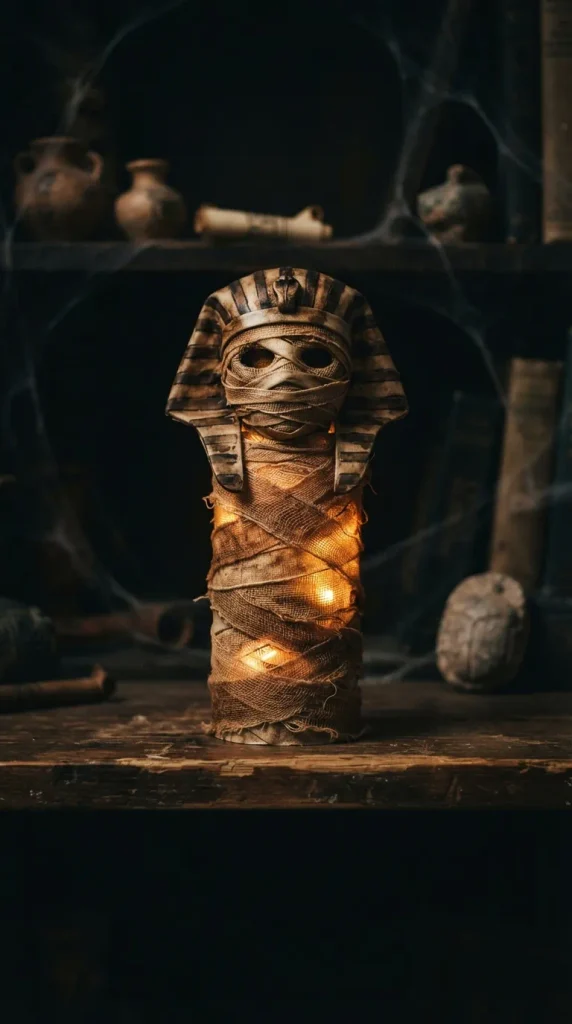
9. Eerie Egyptian Mummy Luminaries
Wrap your home in ancient mystery with these adorable yet haunting miniature mummy lanterns that cast a warm, textured light.
What You Need:
- Toilet paper rolls
- Gauze bandage rolls or cheesecloth
- Tea stain or coffee wash
- Googly eyes or paper cutouts
- Battery-operated tea lights
How to Make It: Submerge your gauze bandages or cheesecloth in a warm bath of strong coffee or tea for ten minutes to give them an authentic, aged yellow-brown patina. Let them dry completely. Wrap the stained gauze haphazardly around the toilet paper roll, leaving small gaps in the layers. Secure the ends with subtle dabs of craft glue. Tuck two small googly eyes or hand-cut paper eyes peeking out from beneath the bandage layers. Place a tea light inside to complete the charmingly spooky effect.
Tips and Variations: Drape faux spiderwebs over the top of the mummies and add tiny plastic spiders crawling up the gauze for an extra layer of eerie detail.
10. Moody Black Rose & Thistle Vases
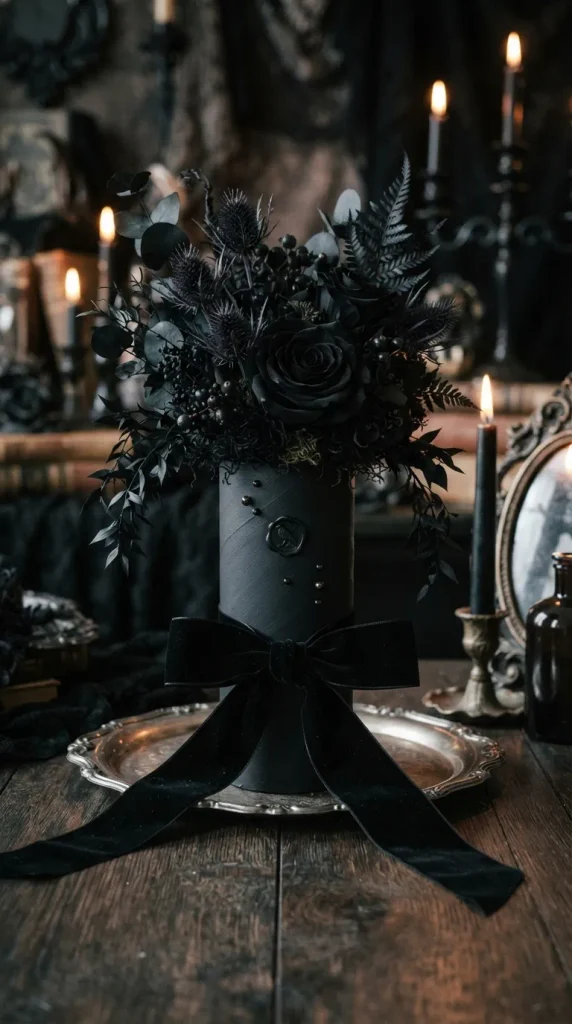
Create dramatic floral arrangements housed inside dark, sophisticated vessels made entirely from recycled cardboard tubes.
What You Need:
- Toilet paper rolls
- Small plastic cups or test tubes that fit inside
- Black matte spray paint
- Faux black roses and dried thistle stems
- Velvet ribbon
How to Make It: Insert a small, waterproof plastic cup or floral test tube securely into the top opening of the toilet paper roll, securing it with hot glue so the rim sits flush. Spray paint the entire exterior of the tube with a rich, light-absorbing matte black spray paint. Tie a luxurious velvet ribbon tightly around the center of the vase in a neat bow. Fill the inner vessel with water (if using fresh stems) or floral foam, and arrange dramatic faux black roses, dark foliage, and spiky thistle stems inside.
Tips and Variations: Dust the black roses lightly with translucent craft glitter to mimic midnight frost settling over a winter garden.
11. Creepy Crawly Spider Egg Sacks
Hanging from porch ceilings or dark room corners, these eerie egg sacks look wonderfully unsettling and organic.
What You Need:
- Toilet paper rolls
- White yarn or synthetic webbing
- Plastic toy spiders
- White nylon stockings or tights
- Fishing line
How to Make It: Crush a toilet paper roll slightly and place a handful of plastic toy spiders inside and around it to add volume and lumpy texture. Slide the tube and spiders into the foot portion of an old pair of white nylon stockings, pulling it taut and tying off the end securely. Wrap thick white yarn or synthetic spider webbing around the outside of the nylon-covered pod until it takes on a dense, cocoon-like shape. Hang the finished egg sack from a dark corner using fishing line.
Tips and Variations: Spray a fine mist of glow-in-the-dark paint over the webbing so the egg sacks emit an eerie greenish luminescence when the lights go out.
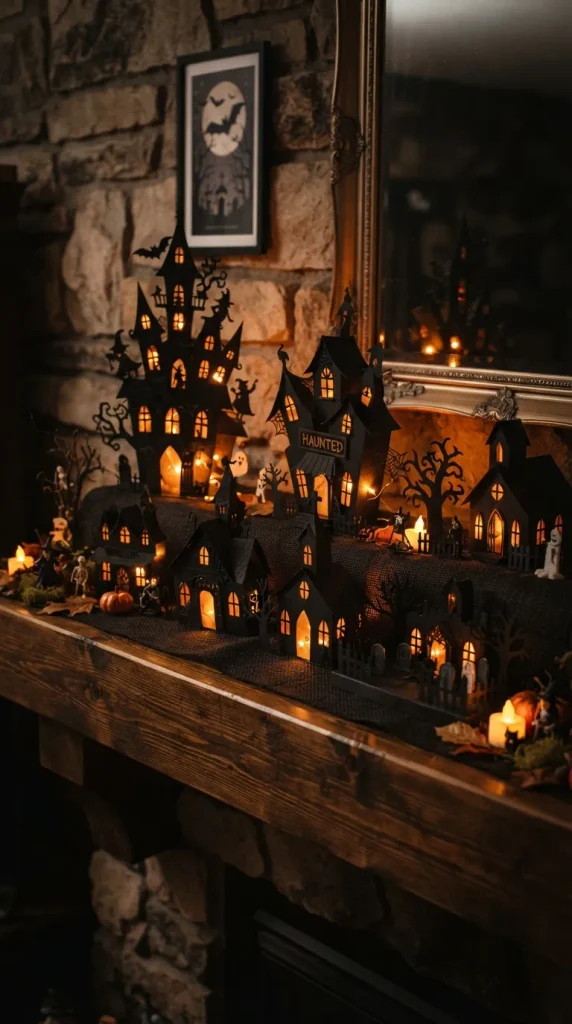
12. Miniature Haunted House Silhouettes
Build an entire midnight village along your mantel using cardboard tubes carved into spooky architectural wonders.
What You Need:
- Toilet paper rolls
- Black cardstock
- Yellow or orange tissue paper
- Craft knife
- Battery-operated fairy lights
How to Make It: Cut small, crooked windows, arched double doors, and jagged rooflines out of black cardstock, leaving tabs to wrap around the toilet paper roll. Cut out triangular roof caps from the same black cardstock and glue them onto the top of each roll. Line the inside of the tubes with yellow or orange tissue paper so that when a light source is placed behind them, the windows glow warmly. Arrange the houses in clusters on your mantel. Thread a string of warm white fairy lights through the open bottoms of the tubes to illuminate the entire village.
Tips and Variations: Add tiny cardboard chimneys puffing out smoke made from teased cotton balls to give the miniature village a lived-in, cozy haunted feel.
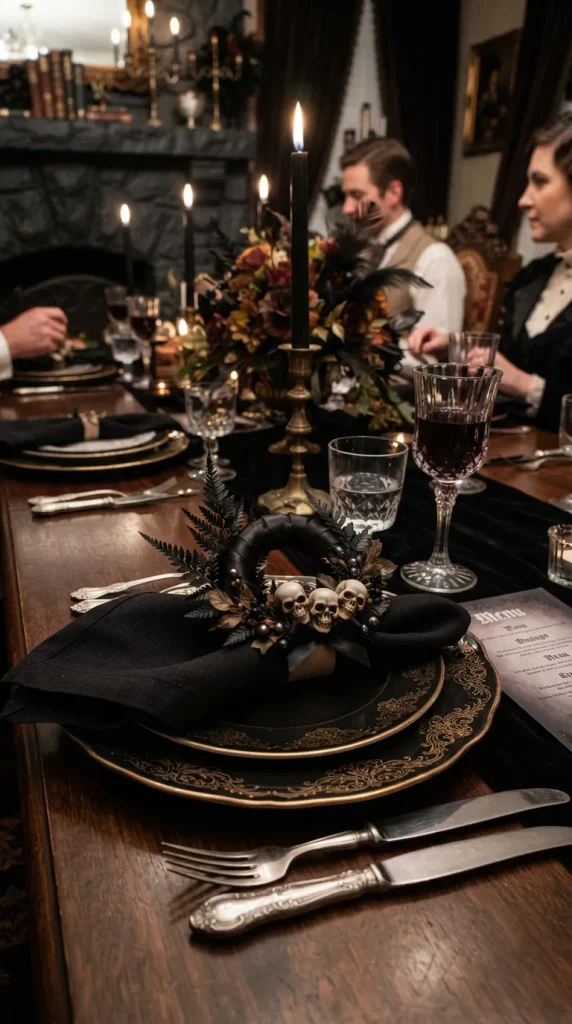
13. Victorian Mourning Wreath Napkin Rings
Elevate your Halloween dinner party table setting with exquisite, dark Victorian-inspired napkin rings crafted from cardboard rings.
What You Need:
- Toilet paper rolls
- Scissors
- Black satin ribbon
- Small plastic skull charms or cameos
- Black faux foliage
How to Make It: Slice a toilet paper roll crosswise into four equal, narrow ring sections. Wrap each cardboard ring tightly with narrow black satin ribbon, securing the ends with hot glue. Cut tiny sprigs of black faux leaves or fern fronds and glue them in a small cluster to the front of the ring. Anchor a tiny plastic skull charm or an antique-style cameo portrait directly over the center of the foliage cluster. Slide your cloth napkins through the finished rings for an unforgettable table setting.
Tips and Variations: Use deep crimson satin ribbon instead of black to tie into a Gothic romance vampire dinner party theme.
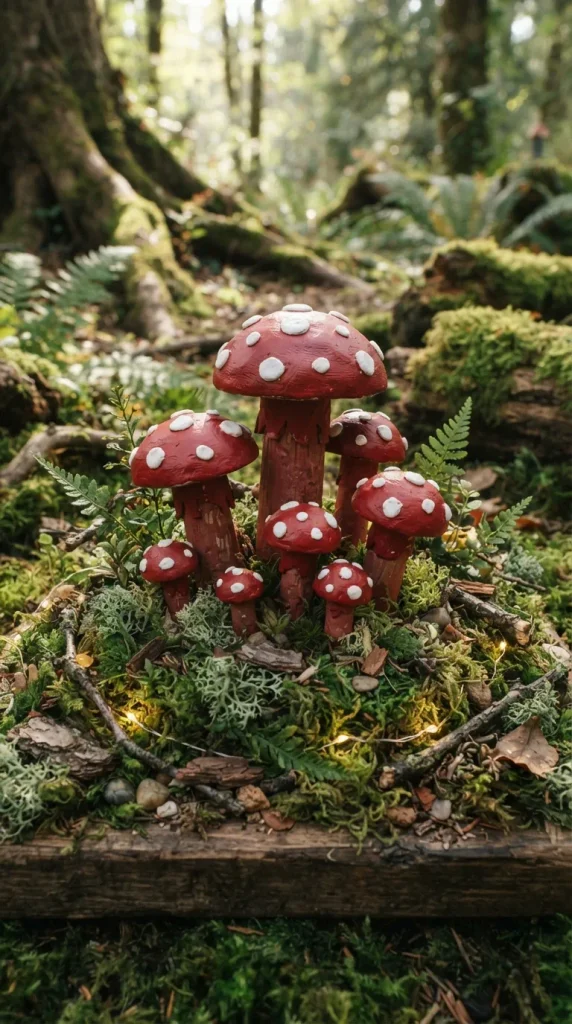
14. Poisonous Mushroom Cluster Diorama
Bring the eerie beauty of a haunted forest floor indoors with a cluster of glowing, textured toadstool mushrooms.
What You Need:
- Toilet paper rolls
- Egg cartons
- Air-dry clay
- Acrylic paint in crimson, white, and earthy brown
- Faux moss
How to Make It: Cut the individual cups out of an egg carton and trim toilet paper rolls into varying heights to serve as the thick stalks of your mushrooms. Use air-dry clay to smooth the transition between the egg carton cap and the cardboard stalk, shaping organic curves. Paint the mushroom caps a vibrant crimson with tiny white painted dots, and paint the stalks an earthy cream. Arrange the mushrooms in a cluster on a piece of slate or bark, surrounding their bases with preserved green faux moss.
Tips and Variations: Insert tiny battery-operated LED fairy lights up through the hollow bottoms of the cardboard stalks so the mushroom caps emit a soft, magical glow in the dark.
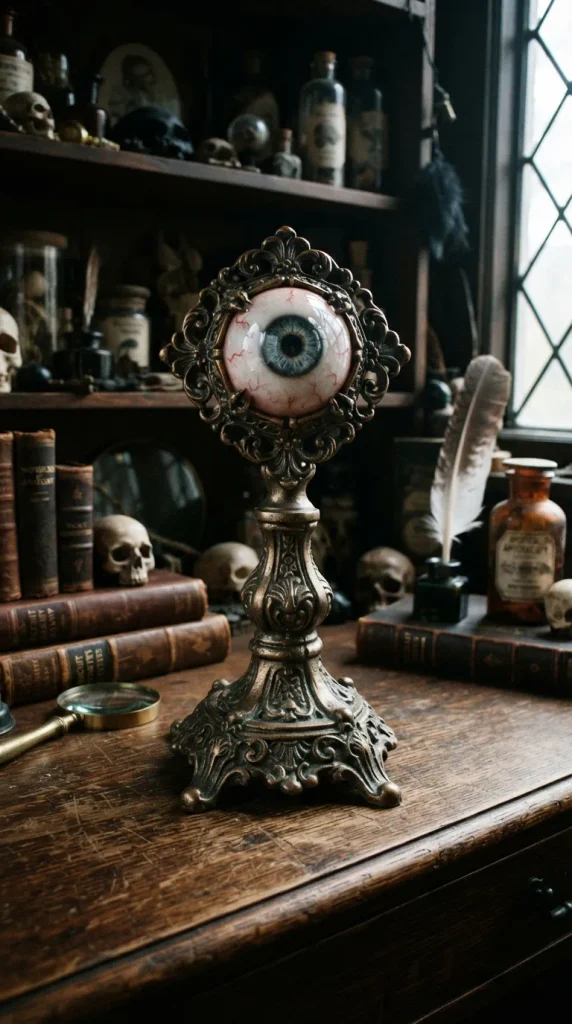
15. Eerie Eyeball Desk Sculptures
Watch your guests wherever they go with these unsettling, realistic floating eyeballs mounted on ornate pedestals.
What You Need:
- Toilet paper rolls
- Large round plastic ornaments or ping-pong balls
- Acrylic paints in blue, green, red, and white
- Fine-tip black permanent marker
- Mod Podge
How to Make It: Paint the inside or outside of a clear plastic ornament or ping-pong ball to resemble a human eye, complete with a colored iris, pupil, and delicate red veining drawn with a fine-tip permanent marker. Cut a toilet paper roll in half and paint it to look like carved stone or aged bronze. Seat the finished eyeball securely in the top opening of the painted cardboard stand. Coat the entire eyeball with a glossy layer of Mod Podge to give it a wet, unsettlingly lifelike sheen.
Tips and Variations: Cluster a dozen of these eyeball sculptures together inside a vintage glass cloche for a magnificent, cabinet-of-curiosities centerpiece.
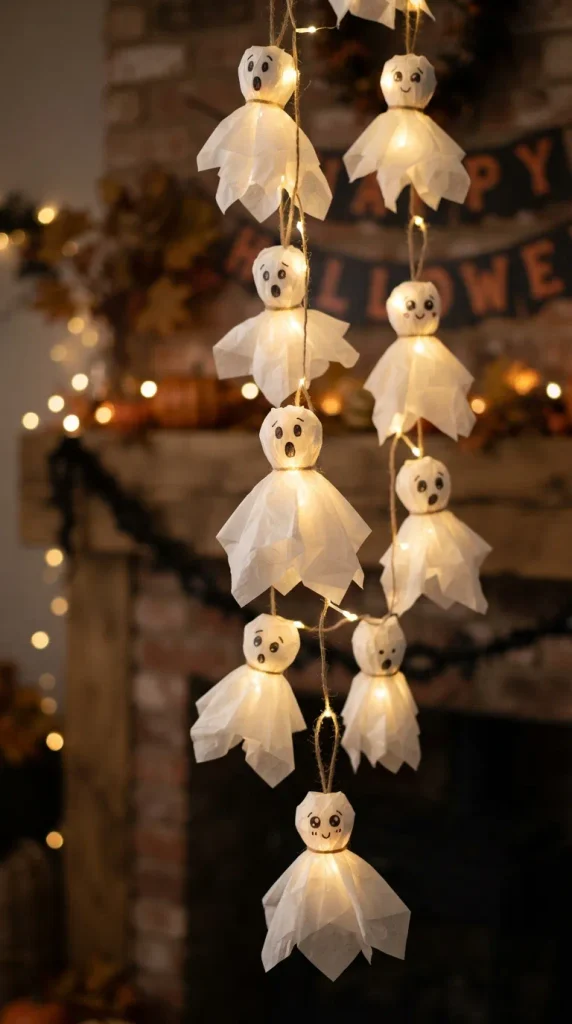
16. Spooky Ghost Garland Ornaments
Drape these gentle, glowing spirits across doorways, curtain rods, or mirrors for a whimsical yet classic Halloween touch.
What You Need:
- Toilet paper rolls
- Square sheets of white tissue paper or cheesecloth
- Black felt marker
- Twine
- Mini LED string lights
How to Make It: Crumple a small piece of scrap paper and place it inside the top of a short toilet paper roll to form a rounded head shape. Drape a square sheet of white tissue paper centrally over the top, smoothing it down the sides to form a flowing ghost body. Tie a piece of fine twine securely around the neck to define the head from the body. Use a black felt marker to draw two surprised, hollow oval eyes on the face. Slide the hollow bottom over individual bulbs on a mini LED string light strand to make the ghosts glow.
Tips and Variations: Use pastel pink or lavender tissue paper for the ghosts to create a trendy, modern “pastel goth” Halloween aesthetic.
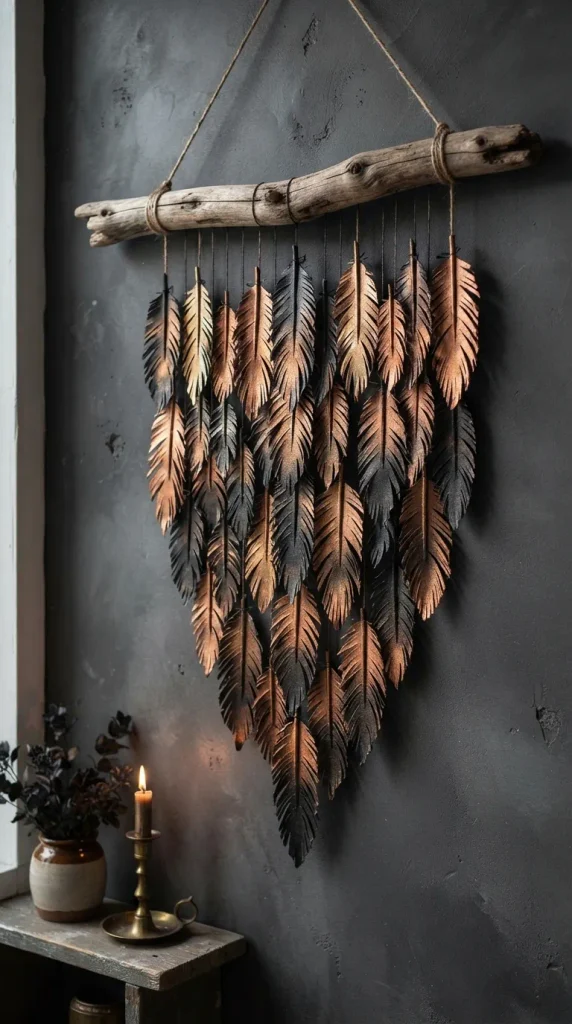
17. Metallic Raven Feather Wall Hangings
Evoking the moody poetry of Edgar Allan Poe, these oversized metallic raven feathers add striking vertical texture to any wall.
What You Need:
- Toilet paper rolls
- Scissors
- Metallic copper, bronze, and charcoal spray paint
- Floral wire
- Hot glue
How to Make It: Flatten a toilet paper roll and cut out a large, elongated feather shape with a pointed tip. Use your scissors to make fine, closely spaced snips along both edges of the feather to create a realistic, fluffy fringe. Glue a piece of sturdy floral wire down the back center spine of the feather to give it bendable structural support. Spray paint the feathers in gradient shades of metallic copper, deep bronze, and charcoal black. Bend the wire spines into natural curves and arrange them hanging from a rustic driftwood branch.
Tips and Variations: Spray the tips of the feathers with strong craft adhesive and dip them in fine black glitter for an iridescent, shimmering raven plumage effect.
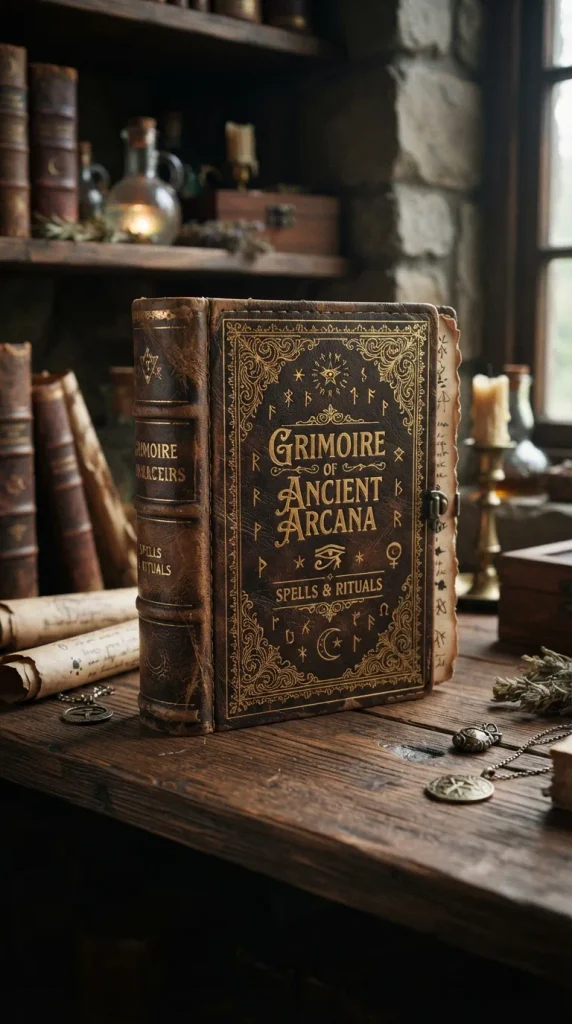
18. Wizard Spell Book Hidden Boxes
Hollow out your crafting supplies to create secret storage books disguised as ancient, leather-bound grimoires of magic.
What You Need:
- Toilet paper rolls (flattened)
- Thick cardboard rectangles
- Faux leather fabric or brown paper bags
- Mod Podge
- Gold metallic paint pen
How to Make It: Glue two flattened toilet paper rolls side by side to create the thick block of “pages” for your book. Cut thick cardboard rectangles slightly larger than the rolls to act as the front and back covers. Wrap the covers and spine in faux leather fabric or crumpled brown paper bags treated with Mod Podge to simulate aged leather binding. Attach the book block inside the covers. Use a gold metallic paint pen to draw intricate corner filigrees and write spell titles like Book of Shadows across the spine.
Tips and Variations: Hide small treats, notes, or battery-operated tea light remotes inside the secret hollow compartment of the book box for an interactive holiday surprise.
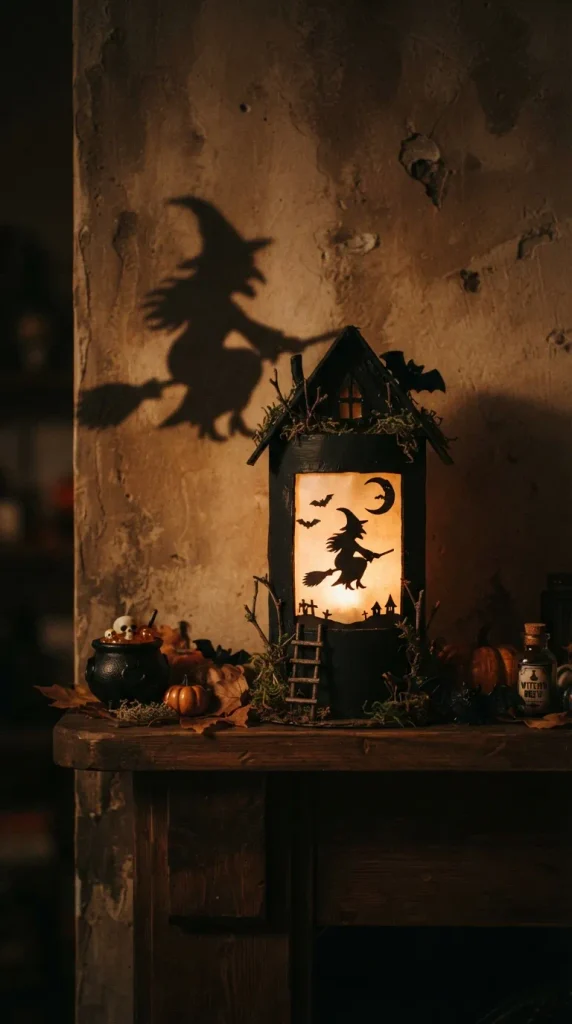
19. Spooky Silhouette Shadow Boxes
Cast haunting shadows across your walls by constructing miniature theater shadow boxes inside recycled cardboard rolls.
What You Need:
- Toilet paper rolls
- Black cardstock
- Translucent vellum paper
- Craft knife
- Tea lights
How to Make It: Cut out one complete side of a toilet paper roll to create a viewing window opening. Glue a piece of translucent vellum paper across this window opening from the inside. Cut tiny silhouette figures—such as a witch on a broomstick, a prowling cat, or a twisted haunted tree—out of black cardstock and glue them onto the vellum screen. Place a tea light inside the tube and darken the room. The flickering light casts an enlarged, cinematic shadow of your silhouette onto the nearest wall.
Tips and Variations: Create a series of connected shadow boxes to tell a sequential spooky story across your bookshelf or window ledge.
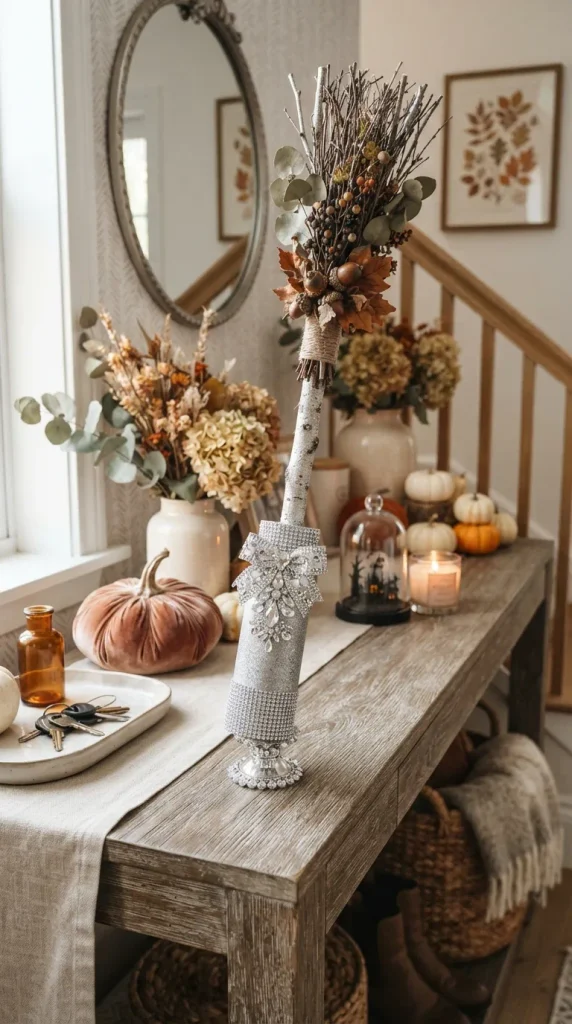
20. Glamorous Crystal Witch Broomsticks
Sweep away boring decor with these bedazzled, elegant miniature broomsticks fit for the most fashionable witches in town.
What You Need:
- Toilet paper rolls
- Straight twigs or small branches
- Raffia or natural jute string
- Silver glitter spray paint
- Rhinestone stickers
How to Make It: Cut fine vertical fringe lines along the lower half of a toilet paper roll, leaving the top uncut. Roll the fringed tube tightly around the end of a sturdy natural twig branch, securing it firmly with hot glue. Wrap natural raffia or jute string tightly around the upper portion of the fringe to form the bristles of the broom, covering the cardboard edge. Spray the entire bristle section with silver glitter spray paint. Adhere a few sparkling rhinestone stickers along the handle of the broom for an unexpected touch of glamour.
Tips and Variations: Tie a cluster of three miniature crystal broomsticks together with black satin ribbon and hang them upside down from your front door knocker as a chic welcome greeting.
More ideas to come in future addition.